Home Blog Page 2

How to Override / Disable Back Button in Flutter the right way in 2023

0

Are you looking for how to disable back button in flutter easily? You are in the right place. When users use your app, it is possible that they could unintentionally click the Back button and exit from the app. This can create a bad experience for your app. So it is always good to ask users if they are ready to exit the app. By default, from the home screen or app bar, if you press the back button you will exit from the app. So in this tutorial, we will show you that Disable Back Button in Flutter.

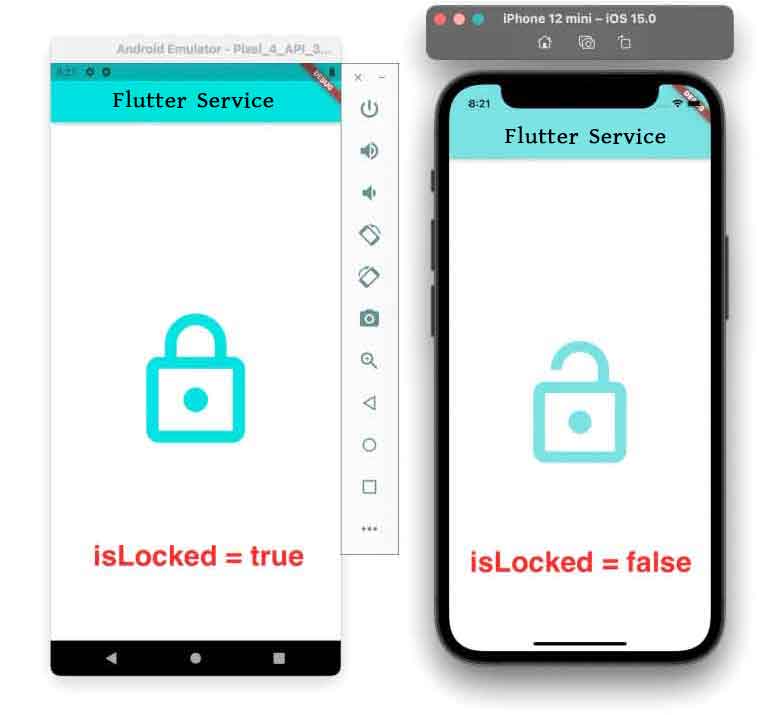
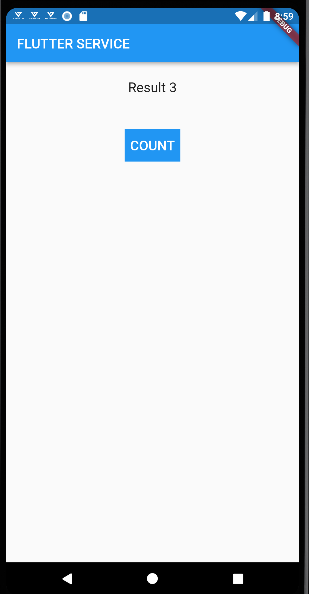
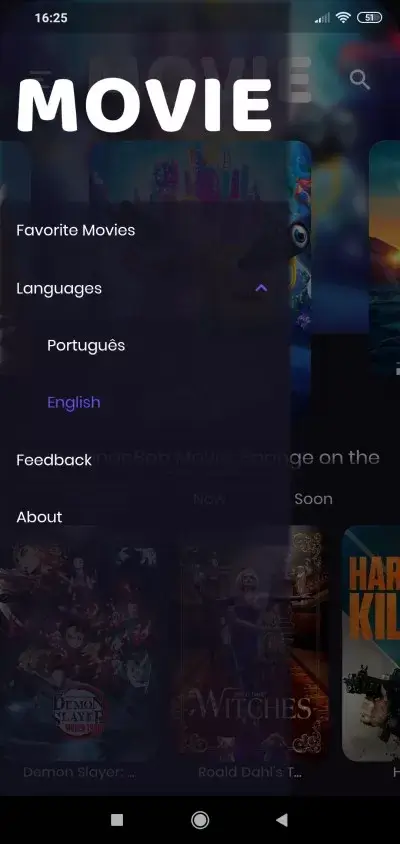
The output will be looks like this:

So what we will learn haaa? We will learn the following things from this article:

  • How to Disable Back Button in Flutter?
  • How to override and disable back button in Flutter?

How to Disable Back Button in Flutter

You can simply use the WillPopScope to disable the back button in Flutter. Now question is, what is WillPopScope? well, WillPopScope is a Flutter Widget that helps to get a callback when the back button is pressed.

So inside the WillPopScope callback, if you simply return false then the screen will not be popped, and the back button will be disabled, if you keep the callback return true then the screen will be popped.

Let’s see how can you do that:

  • Wrap Scaffold widget by using the WillPopScope like this:

WillPopScope(

onWillPop: _onPop,

child: Scaffold(

…………………………………………………..

  • Now add the _onPop parameter inside the WillPopScope. Then create a method and assign it to handle the callback.
  • Now keep return false inside the callback.

Code Example:

class _MyHomePageState extends State<MyHomePage> {
  Future<bool> _onPop() async {
    return false;
  }

  @override
  Widget build(BuildContext context) {
    return WillPopScope(
      onWillPop: _onPop,
      child: Scaffold(
        appBar: AppBar(
          centerTitle: true,
          title: Text(widget.title),
        ),
        body: const Center(
          child: Text(
            "FLUTTER SERVICE HOME",
            style: TextStyle(fontWeight: FontWeight.bold),
          ),
        ),
      ),
    );
  }
}

How to override and disable back button in Flutter?

You need to use the WilllPopScope widget to override that back button in flutter and then show the confirmation dialog to the user if they want to exit or not. So what will happen? If the user clicks the back button, it will show a dialog and ask a user for exit confirmation. If the user presses Yes then it will exit if the user presses No then it will not exit.

Same as before,

  • Wrap Scaffold widget by using the WillPopScope like this:

WillPopScope(

onWillPop: _onWillPop,

child: Scaffold(

…………………………………………………..

  • Now add the _onPop parameter inside the WillPopScope. Then create a method and assign it to handle the callback.
  • Now add the AlertDialog widget inside the callback. Also, add options like Exit, Yes, or No using the TextButton or Elevated button what you like.
  • Keep the Navigator.of(context).pop(false) inside the onPress() to stop exiting the app.
  • Keep the Navigator.of(context).pop(true) inside the onPress() to exit the app.

Full Code Example:

class MyHomePage extends StatefulWidget {
  const MyHomePage({super.key, required this.title});

  final String title;

  @override
  State<MyHomePage> createState() => _MyHomePageState();
}

class _MyHomePageState extends State<MyHomePage> {
  Future<bool> _onPop() async {
    return (await showDialog(
          context: context,
          builder: (context) => AlertDialog(
            title: new Text('Are you sure?'),
            content: new Text('Exit the App'),
            actions: <Widget>[
              TextButton(
                onPressed: () => Navigator.of(context).pop(false),
                //<-- SEE HERE
                child: new Text('No'),
              ),
              TextButton(
                onPressed: () => Navigator.of(context).pop(true),
                // <-- SEE HERE
                child: new Text('Yes'),
              ),
            ],
          ),
        )) ??
        false;
  }

  @override
  Widget build(BuildContext context) {
    return WillPopScope(
      onWillPop: _onPop,
      child: Scaffold(
        appBar: AppBar(
          centerTitle: true,
          title: Text(widget.title),
        ),
        body: const Center(
          child: Text(
            "FLUTTER SERVICE HOME",
            style: TextStyle(fontWeight: FontWeight.bold),
          ),
        ),
      ),
    );
  }
}

So we have learned how to override the back button / disable back button in flutter easily. We have seen how to disable the back button using the WillPopScope widget. After that, we have using the override the back button and display the user confirmation dialog. If you still face any issues, please send us a message from the chatbox. We are here to support you.

Read More:

How to Use Flutter If Not boolean Value

How To Easily Use Font Awesome In Flutter | Simplified 2023

0
How To Easily Use Font Awesome In Flutter | Everything Simplified

This tutorial will enlighten you about how to easily use font awesome in flutter in brief!

Flutter provides an inbuilt icon pack for your app to use, but it only has a small selection of icon sets, so you must rely on other icon packs. One of the best icon sets for flutter or web applications is Font Awesome. To use Font Awesome icons in your app, see the example below.

People, who read this article also read: Flutter SDK Installation on Windows, macOS, Linux

You must first include the font_awesome_flutter Flutter Package in your dependency list. You should add the next line to your pubspec.yaml file.

dependencies:
  flutter:
    sdk: flutter
  font_awesome_flutter: ^8.8.1

Use the sets of Default Material Icons

import 'package:font_awesome_flutter/font_awesome_flutter.dart';
Icon(FontAwesomeIcons.cartPlus)

Font Awesome in Flutter Dimensions and Color

Icon(FontAwesomeIcons.user,
    size: 50, //Icon Size
    color: Colors.white, //Color Of Icon
)

Visit the Font Awesome website to learn the name of the icon. 1500+ icons are available for free. Use an icon’s name in Flutter by getting the name of the icon. Be careful because while the starting word in Flutter is similar, the Icon name is not exactly the same. The name will be suggested if you use Visual Studio Code with the Dart and Flutter extensions.

Font Awesome in Flutter Dimensions and Color

You can use Font Awesome icons by looking at the example below.

import 'package:flutter/material.dart';
import 'package:flutter/widgets.dart';
import 'package:font_awesome_flutter/font_awesome_flutter.dart';

class UseFontAwesome extends StatelessWidget{
  @override
  Widget build(BuildContext context) {
    return Scaffold(
       appBar: AppBar(
           title: Text("Use Icons"),
           leading: Icon(Icons.menu),
           //placing inbuilt icon on leading of appbar
           actions: <Widget>[
               
               IconButton(
                 onPressed: (){},
                 icon: Icon(FontAwesomeIcons.envelope), 
                 //using font awesome icon in action list of appbar
              ),

              IconButton(
                 onPressed: (){},
                 icon: Icon(FontAwesomeIcons.cartPlus), 
                 //cart+ icon from FontAwesome
              ),

              IconButton(
                 onPressed: (){},
                 icon: Icon(FontAwesomeIcons.userAlt), 
                 //cart+ icon from FontAwesome
              ), 
           ],
       ), //set app bar

       body: Container(
          height:300, //height of container
          alignment: Alignment.center, //alignment of content
          padding:EdgeInsets.all(20), //padding of container wrapper
          child:RaisedButton.icon(
                onPressed:(){
                    //action for raised button.
                }, 
                icon: Icon(FontAwesomeIcons.user,
                    size: 50, //Icon Size
                    color: Colors.white, //Color Of Icon
                ), 
                label: Text("Awesome", style: TextStyle(
                    fontSize: 60, //button font size
                    color: Colors.white //button font color
                ),),
                color: Colors.deepOrangeAccent, //color of button
          )
       )
    );
  }
}

Conclusion

In this manner, you can use Font Awesome in Flutter to enhance the visual appeal and usability of your app.

People, who read this article also read: Flutter Liquid Swipe Animation

Because of its efficiency and simplicity, the font awesome in Flutter is one of the most used components, especially in mobile applications. In this tutorial, we created a straightforward font awesome in Flutter using the built-in widget of the font awesome in Flutter. I sincerely hope you liked this tutorial!

Check the following video for more in-depth explanation:

How to Use Flutter If Not boolean Value in 2023

0
Flutter If Not boolean Value

The most common conditional statement is used flutter if not boolean value. This is very commonly used in different logical functions. In this article, we will discuss logical operators and flutter if not boolean value. bool is the type of Dart that represents a boolean value that can be true or false.

Flutter If Not boolean Value

The logical operator is the same in all languages. In dart, there is no difference. The logical operator also uses to combine or invert the boolean expressions.

OperatorMeaning
&&Logical AND
||Logical OR
!exprinvert boolean

Example 1:

bool isDownloading = true;
bool isConnection = false;


assert(!isDownloading ); // true
assert(isConnection || isDownloading ); // true because at least one is true
assert(isDownloading && !isConnection); // true because both are true

Example 2:

Let’s consider, we will download a new mp3 from the URL. The important books is isDownloadReady. When it was true, then app start downloading, if not then it will not download the mp3. There have a gallery so I use a bool ifStorageFull, so if it is true then will appear a message that the storage is full, delete some mp3. Let’s consider that the gallery exists 50 mp3.

bool ifStorageFull;
int mp3;
@override
Widget build(BuildContext context) {
  if (mp3> 100) {
    ifStorageFull= true;
  } else {isStorageFull = false;}
return Container(
  child: ifStorageFull? Text("Delete some images") : Text("You can  add more pictures")
 );
}

So the schema is:

if (fullfilled condition) {
   yourBool = true;
} else {yourBool} = false;

Example 3:

// first assign

bool isFileExist = true;
bool isInternetConnection = true;

// we can combine boolean with  &&, ||, and other symbols
// if isFileExist is true AND isInternetConnection is true
bool isDownloadAnotherFile = isFileExist && isInternetConnection;

if (isDownloadAnotherFile ) {
  print("Downloading next file!");
} else {
  print("Downloading current File!");
}

At last of Flutter If Not boolean Value

  • Declare the bool with the name isAnyThing or isSomething. example: isDownloading, isFileExist.
  • Variable true or false check.
  • Execute the code after resulting in the true or false.

Read More:

Top 3 Best Ways to Use Flutter Conditional Show Widget

Top 3 Best Ways to Use Flutter Conditional Show Widget in 2023

0
Top 3 Best Ways to Flutter Conditional Show Widget

This article will show the top 3 best ways to use the Flutter conditional show widget. 

You teach machines (hardware) how to execute a process in application development (or, more specifically, software development in general) based on various conditions written in an if-else statement. It’s simple to write an if-else statement in a method or function when creating a Flutter app. However, there must have been a circumstance where you had to include the if-else statement inside your Flutter conditional show widget. Right? In this tutorial, we’ll look at three ways to use the if statement in a Flutter conditional show widget.

People, who read this article also read: Flutter Liquid Swipe Animation

We’ll talk about the following:

The Challenge

It doesn’t appear to be difficult to construct an if-else statement in a method or function. The error, however, appears when you attempt to use the if-else statement directly in your Flutter conditional show widget. 

if-else statement
if-else statement

Unfortunately, unlike methods or functions, an if statement cannot be written inside a Flutter conditional show widget. However, there are a few different ways you can construct a conditional statement within your widget. Let’s view them now.

The Flutter Conditional Show Widget If Else Statement: Useful Techniques

The conditional statement can be added to your widget in one of the following three ways. 

As follows:

  • By means of the Ternary Operator
  • Making use of the Spread Operator
  • Utilizing the Method

Any of these can be used to create an if else statement in a Flutter conditional show widget based on your needs.

By means of the Ternary Operator

An operand for a ternary operator is three. The first condition is followed by an expression if the condition is true, and the third is an expression if the condition is false.

Here’s how it appears

(age > 18) ? 'Eligible for license' : 'Not eligible'

The code above states that a user is eligible for a license if their age is greater than 18, otherwise they are not. 

We can employ a similar strategy in the Flutter code to display the widgets according to a condition. Let’s check how.

Example

Center(
    child: isLiked
        ? Row(
            mainAxisAlignment: MainAxisAlignment.center,
            crossAxisAlignment: CrossAxisAlignment.end,
            children: const [
              Text(
                '12',
                style: TextStyle(fontSize: 120),
              ),
              Icon(
                Icons.thumb_up,
                size: 180,
                color: Color(0xff6ae792),
              ),
            ],
          )
        : const Icon(
            Icons.thumb_up,
            size: 200,
            color: Colors.black,
          ))

If a post has any likes, the code above will display the number of likes along with a like button. A simple “like” button is all else.

Output

Output
Output

How to use

Use the ternary operator only to check a single condition, if at all possible. The ternary operator should not be nested, and you should use the method to create multiple if-else statements. By doing this, clearer code will be produced.

Making use of the Spread Operator

To add multiple values to a Collection, use the spread operator (…). It first appeared in Dart 2.3. The spread operator must be contained within a collection widget, such as a Column, Row, or another widget.

The following is an example of how to write an if-else statement using the spread operator:

[
  if (age > 18) ...[
    // show license
  ] else ...[
    // show error message
  ]
]

The aforementioned code only displays the license if the user is older than 18.

Sample 1

Column(
  mainAxisAlignment: MainAxisAlignment.center,
  children: [
    if (isShowComment) ...[
      const Icon(
        Icons.comment,
        size: 200,
        color: Color(0xff6ae792),
      )
    ] else ...[
      const Icon(
        Icons.comment,
        size: 100,
        color: Colors.black,
      )
    ]
  ],
)

If the isShowComment variable is true, we display the comment icon inside the Column widget. If not, we display a different widget.

Sample 2

Column(
  mainAxisAlignment: MainAxisAlignment.center,
  children: [
    const Icon(
      Icons.thumb_up,
      size: 100,
      color: Colors.black,
    ),
    if (isShowComment) ...[
      const Icon(
        Icons.comment,
        size: 200,
        color: Color(0xff6ae792),
      )
    ]
  ],
)

This is an additional use case where we display several widgets in a column. If the value of isShowComment is true, we only choose to display a comment widget (along with a Like widget).

Sample 3

Column(
  mainAxisAlignment: MainAxisAlignment.center,
  children: [
    if (isShowComment) ...[
      const Icon(
        Icons.comment,
        size: 200,
        color: Color(0xff6ae792),
      )
    ] else if (isShowLike) ...[
      //Your widget
    ] else ...[
      //Your widget
    ]
  ],
)

As demonstrated in the code above, the spread operator can also be used to create multiple if-else statements.

Output

Flutter Conditional Show Widget If Else Statement

When to use: If your child is contained within a collection like a Column or Row, it is preferable to write conditional statements using the spread operator. 

Utilizing the Method

If none of the methods mentioned above work for you, the next best thing to do is to use a method to write an if-else statement. A clearer code is produced when a condition statement is added to a method.

People, who read this article also read: Flutter SDK Installation on Windows, macOS, Linux

Example:

Center(
  child: getLockStatus(),
)
Widget getLockStatus() {
  if (isLocked) {
    return const Icon(
      Icons.lock_outline,
      size: 200,
      color: Color(0xff6ae792),
    );
  } else {
    return const Icon(
      Icons.lock_open,
      size: 200,
      color: Colors.black,
    );
  }
}

A specific method is now where the if-else clause with a widget (to be returned) is located. In accordance with the return condition inside, the method returns the widget. 

Output

Output
Output

How to use

If you want to write clean code and none of the other options work for you, writing a conditional statement inside the method is preferable.

Thanks!

Conclusion

The three approaches to writing an if else statement in a Flutter conditional show widget have been covered in this tutorial, along with a real-world example. Additionally, we discovered the best times to use each one based on your needs.

Would you like to view some additional engaging Flutter tutorials?

How To Add Flutter Row Spacing Between Column (2023)

0
How To Add Flutter Row Spacing Between Column

This article will shed light on how to add flutter row spacing between column.

For creating UI in the Flutter app, the Column and Row widgets are crucial. You might notice that there is no space added between the widgets as you develop your app and add Flutter row spacing between Column. However, if you want your app design to look better, you might want to add some distance between the kids. We’ll therefore see the top 4 approaches to add row spacing between Column with examples in this tutorial.

How to Increase the Spacing Between Widgets in Flutter

To add Flutter row spacing between column in the following ways:

  1. Using SizedBox
  2. Using Spacer
  3. Using Expanded
  4. Using MainAxisAlignment (Recommneded)

Any of these approaches can be used, depending on your needs.

1. Using SizedBox To Add Flutter Row Spacing Between Column

You can designate the width and height of an empty box using the SizedBox widget. You must specify the height property when using the SizedBox widget in a Column, whereas you must specify the width property when using it in a Row widget.

Examples of codes

Column(
  children: [
    ElevatedButton(
      onPressed: () {},
      child: const Text(
        'Button 1',
        style: TextStyle(fontSize: 24),
      ),
    ),
    SizedBox(
      height: 50, // <-- SEE HERE
    ),
    ElevatedButton(
      onPressed: () {},
      child: const Text(
        'Button 2',
        style: TextStyle(fontSize: 24),
      ),
    ),
  ],
)
//-----
Row(
  children: [
    ElevatedButton(
      onPressed: () {},
      child: const Text(
        'Button 1',
        style: TextStyle(fontSize: 24),
      ),
    ),
    SizedBox(
      width: 20, //<-- SEE HERE
    ),
    ElevatedButton(
      onPressed: () {},
      child: const Text(
        'Button 2',
        style: TextStyle(fontSize: 24),
      ),
    ),
  ],
)

Output:

Using SizedBox To Add Flutter Row Spacing Between Column
Using SizedBox
Visual Learning

2. Using Spacer

The Spacer widget in Flutter allows you to add a blank space that you can modify to fit your design. By default, it takes all the available space and shifts the adjacent widget to the far side. You can manage the distance between widgets by adjusting the flex property of the Spacer widget.

Examples of codes

Column(
  children: [
    ElevatedButton(
      onPressed: () {},
      child: const Text(
        'BTN',
        style: TextStyle(fontSize: 24),
      ),
    ),
    Spacer(), // <-- SEE HERE
    ElevatedButton(
      onPressed: () {},
      child: const Text(
        'BTN',
        style: TextStyle(fontSize: 24),
      ),
    ),
    Spacer(
      flex: 2, // <-- SEE HERE
    ),
    ElevatedButton(
      onPressed: () {},
      child: const Text(
        'BTN',
        style: TextStyle(fontSize: 24),
      ),
    ),
  ],
),
//-----
Row(
  children: [
    ElevatedButton(
      onPressed: () {},
      child: const Text(
        'BTN',
        style: TextStyle(fontSize: 24),
      ),
    ),
    Spacer(), // <-- SEE HERE
    ElevatedButton(
      onPressed: () {},
      child: const Text(
        'BTN',
        style: TextStyle(fontSize: 24),
      ),
    ),
    Spacer(
      flex: 2, // <-- SEE HERE
    ),
    ElevatedButton(
      onPressed: () {},
      child: const Text(
        'BTN',
        style: TextStyle(fontSize: 24),
      ),
    ),
  ],
),

Output:

Using Spacer
Using Spacer
Visual Learning

3. Using Expanded

Any child of a Column or Row that is wrapped inside an Expanded widget will take up the entire space in the main direction. For instance, placing an expanded widget in a column causes it to expand vertically, whereas placing one in a row causes it to fill the entire horizontal space. This is how it creates the empty space. 

Examples of codes

Column(
  children: [
    ElevatedButton(
      onPressed: () {},
      child: const Text(
        'BTN',
        style: TextStyle(fontSize: 24),
      ),
    ),
    Expanded( // <-- SEE HERE
      child: SizedBox.shrink(),
    ),
    ElevatedButton(
      onPressed: () {},
      child: const Text(
        'BTN',
        style: TextStyle(fontSize: 24),
      ),
    ),
    Expanded( // <-- SEE HERE
      child: SizedBox.shrink(),
      flex: 3,
    ),
    ElevatedButton(
      onPressed: () {},
      child: const Text(
        'BTN',
        style: TextStyle(fontSize: 24),
      ),
    ),
  ],
)
//------
Row(
  children: [
    ElevatedButton(
      onPressed: () {},
      child: const Text(
        'BTN',
        style: TextStyle(fontSize: 24),
      ),
    ),
    Expanded( // <-- SEE HERE
      child: SizedBox.shrink(),
    ),
    ElevatedButton(
      onPressed: () {},
      child: const Text(
        'BTN',
        style: TextStyle(fontSize: 24),
      ),
    ),
    Expanded( // <-- SEE HERE
      child: SizedBox.shrink(),
      flex: 3,
    ),
    ElevatedButton(
      onPressed: () {},
      child: const Text(
        'BTN',
        style: TextStyle(fontSize: 24),
      ),
    ),
  ],
)

Output:

Using Expanded
Using Expanded
Visual Learning

The predetermined space between the widgets can be added by using the MainAxisAlignment property of Column and Row. The MainAxisAlignment property eliminates the need for additional widgets to be placed in between the widgets.

The following list includes each MainAxisAlignment option:

enum MainAxisAlignment {
  /// Place the children as close to the start of the main axis as possible.
  start,
  /// Place the children as close to the end of the main axis as possible.
  end,
  /// Place the children as close to the middle of the main axis as possible.
  center,
  /// Place the free space evenly between the children.
  spaceBetween,
  /// Place the free space evenly between the children as well as half of that
  /// space before and after the first and last child.
  spaceAround,
  /// Place the free space evenly between the children as well as before and
  /// after the first and last child.
  spaceEvenly,
}

Examples of codes

Column(
  mainAxisAlignment: MainAxisAlignment.spaceEvenly, // <-- SEE HERE
  children: [
    ElevatedButton(
      onPressed: () {},
      child: const Text(
        'BTN',
        style: TextStyle(fontSize: 24),
      ),
    ),
    ElevatedButton(
      onPressed: () {},
      child: const Text(
        'BTN',
        style: TextStyle(fontSize: 24),
      ),
    ),
    ElevatedButton(
      onPressed: () {},
      child: const Text(
        'BTN',
        style: TextStyle(fontSize: 24),
      ),
    ),
  ],
)
//----
Row(
  mainAxisAlignment: MainAxisAlignment.spaceEvenly, // <-- SEE HERE
  children: [
    ElevatedButton(
      onPressed: () {},
      child: const Text(
        'BTN',
        style: TextStyle(fontSize: 24),
      ),
    ),
    ElevatedButton(
      onPressed: () {},
      child: const Text(
        'BTN',
        style: TextStyle(fontSize: 24),
      ),
    ),
    ElevatedButton(
      onPressed: () {},
      child: const Text(
        'BTN',
        style: TextStyle(fontSize: 24),
      ),
    ),
  ],
)

Output:

Using MainAxisAlignment

Conclusion

With the help of useful examples, we learned how to add Flutter row spacing between column in this tutorial. The SizedBox, Spacer, and Expanded widgets were the first things we saw. These are the techniques you can use to insert the filler widget in between the children. Finally, we saw how to add space between widgets in Flutter using the suggested method, which makes use of the MainAxisAlignment option.

Check out some more engaging Flutter tutorials, if you’d like.

Top Best 5 Video Chat App in Flutter (2023)

0
Top 5 Video Chat App in Flutter

The best 5 video chat app in Flutter will be discussed today. In our capacity as a mobile app development company, we test numerous products on the Google Play Store and App Store. Finding the ideal video chat app in Flutter that satisfies our needs is taking a lot of time. The ideal ratio of features to stability is what we require. This is among our highest priorities.

The 5 Video Chat App in Flutter that we will be covering today:

People, who read this article also read: Flutter Liquid Swipe Animation

Whoxa

Whoxa
Whoxa

Whoxa is a Firebase-powered WhatsApp clone app with audio and video calling.

A WhatsApp clone app is called Whoxa. We used the flutter Firebase app, which can also be used as a video chat app in Flutter, for a chat. Android and iOS are supported by this app. While using Whoxa, you can make audio-video calls as well as use the real-time chat feature.

What you can do with Whoxa includes the following:

  • Admin Dashboard: Access all of your data in one location.
  • Blocked Users list: View the users you have blocked and, if necessary, unblock them.
  • Graph Analytics: Learn how much activity there is on your app and where it comes from.
  • Call History: View a list of all calls made using the app, and place new calls as required.
  • Users list: See a list of all of your users and their app activity.
  • Group List: View the groups to which you belong and sign up to receive notifications when a post is made in one of them.

15 Mind-blowing Features of the Video Chat app in Flutter

  1. Welcome-Screen
  2. Sign Up Using a Mobile Number for WhatsApp
  3. Pick a country by code
  4. Profile
  5. Live chat like Whatsapp
  6. Messages sent locally
  7. Create a new group chat or contact-based chat with users of an existing app.
  8. Publish a message for broadcast
  9. Add a new contact
  10. If you long-press a chat, you can pin it, delete it, archive it, mute it, mark it as unread, view contacts, and select all chats.
  11. Lookup individuals, teams, messages, and chat rooms 
  12. Go to the Status-Screen tab by sliding to the right.
  13. Chats are opened by clicking on them. 
  14. Open the camera tab by left-swiping.
  15. The user profile photo is displayed when you click on a user icon.

My Church App: An iOS and Android Video Chat App in Flutter

My Church App: An iOS and Android Video Chat App in Flutter

MyChurchApp’s video chat app in Flutter is a version that includes support for both the Android and iOS operating systems.

Go beyond Sunday services and the confines of your church. The following are the essential features that your church app must have, which we have compiled:

Livestreaming, radio, events, devotionals, notifications, notes, multiple translations of the bible, audio/video messages, and subscription plans to watch videos or hear audio messages. Seven bible translations are included in the app, including the KJV, NKJV, AMPLIFIED, NLT, NIT, MESSAGE, and NRSV versions.

Includes social networking features that allow users to interact, share photos and videos, follow, and chat with one another.

The following are its characteristics

  1. Google and Facebook Login
  2. The most recent Flutter version that was used to build this video chat app in Flutter, which was then tested on both iOS and Android gadgets.
  3. Uncluttered admin dashboard
  4. Supports numerous video and audio formats, including m3u8, mpd, rtmp, mp3, mp4, mkv, avi, YouTube, and Vimeo.
  5. Live-streaming from rtmp, m3u8, and YouTube channels are supported.
  6. Supports HTML notes, notes.
  7. Events: Inform users of church activities and events.
  8. Users can send messages to their inboxes as notifications, where they are stored.
  9. Radio
  10. Bible with features like side-by-side version comparison, color highlighting, bookmarking, sharing, and copying.
  11. Supports adding external media URLs 
  12. FCM Push Notifications: From the admin panel, send push notifications
  13. System of Authentication
  14. Email confirmation messages and password recovery.
  15. Comments/Replies/Likes
  16. supports playlists of audio and video.
  17. From the admin dashboard, manage users by blocking, unblocking, or deleting them.
  18. Comments Management – publish, unpublish or delete any user comment from the admin dashboard.
  19. Reported Comments – users can report offensive comments.
  20. Full documentation with a detailed setup guide

MightyChat: A Chat App With Agora + Firebase

MightyChat
MightyChat

Google developed the open-source Flutter mobile application development SDK. Flutter widgets incorporate all crucial platform differences, such as scrolling, navigation, icons, and fonts, to provide full native performance on both iOS and Android. It is used to develop applications for Android and iOS as well as being the primary method of creating applications for Google Fuchsia.

Use the cutting-edge MightyChat online messaging app to make your conversations more engaging and lasting. You can begin communicating with connections immediately after signing in with Google and Email. MightyChat draws inspiration from WeChat-like apps like WhatsApp, Signal, and Signal in order to provide an even better user interface. Each conversation is brighter and livelier thanks to the high-quality chat screen and video call feature. Agora Library is used by MightyChat for video calls.

With just one click, you can share and send texts to your contacts. AdMod Integration allows you to monetize your MightyChat app further.

Functions of the app

  1. (Gmail or Google) Sign in
  2. Online QR scanner
  3. Encryption of Messages
  4. Share a voice memo
  5. Group Chat: Delete & Clean
  6. Low Light
  7. Find Users
  8. Modify Profile
  9. Status of the user (online, last seen, single, double tick)
  10. Visual calls
  11. Call Records
  12. Wallpaper replacement
  13. Remove all messages
  14. Update to User Status of Another User’s Profile
  15. Modifying Font Size
  16. Enter key should be changed to Send Key from Settings.
  17. Read/Unread Messages by the User.
  18. Number of Unread Messages in Chat List Screen
  19. Integration of AdMod
  20. Unsend a message
  21. Cloud Firestore by Firebase
  22. Cloud Storage with Firebase
  23. The Firebase Analytics
  24. Using Firebase Crashlytics
  25. Video Call with Agora SDK

FiberChat

FiberChat
FiberChat

Fiberchat is a full-featured WhatsApp clone that is available for both Android and iOS.

Android and iOS devices are supported by Fiberchat, a WhatsApp clone with full chat. It features a simple user interface and user experience, mobile OTP login (which supports all country codes), passcode authentication, device contacts, one-to-one chat, chat without saving number, accept/reject new user invitations, and user status (online, last seen, mistyping). Along with that, it offers video calling and a lot more.

People, who read this article also read: Flutter SDK Installation on Windows, macOS, Linux

We sincerely hope you take pleasure in using it as much as we do!

BENEFITS LIST

  1. Support for Android and iOS Devices
  2. Refined UI/UX
  3. One-on-One Discussion
  4. Chat without logging in
  5. User status (on, last seen, typing)
  6. Call records (including call duration)
  7. View Unseen Messages
  8. Sending Text Messages Back
  9. Share any documents, videos, or photos.
  10. Distribute Audio Records
  11. Exchange Contacts
  12. Express Current Place 
  13. GIF Share (from the GIPHY Gallery)
  14. Media Download
  15. Alter your wallpaper
  16. Watch a Video
  17. Hiding and Locking Chat
  18. End-to-End Encryption (Only the sender and recipient can read text messages in One-to-One Chat) is the 23rd security measure. Admin herself is unable to read them.
  19. Control of Admob ads (banner, interstitial, and video ads) from the admin video chat app in Flutter
  20. Multilingual (Additional – ON DEMAND)

MeetAir: Video Chat App in Flutter for Android and iOS

MeetAir
MeetAir

To start your online meeting platform quickly, use MeetAir, a full-featured video conferencing system. For managing meetings, histories, notifications, analytics, app configuration, and many other things, it has the most robust admin panel. One of the best mobile development platforms, Flutter, was used to create MeetAir. Both iOS and Android operating systems can use the app.

Typical Elements:

  1. Free audio and video conferencing.
  2. Social login(Facebook, Google, Phone).
  3. To invite others, create a meeting and share the code.
  4. Enter Meeting without logging in.
  5. YouTube live-streaming
  6. Control access to your conferences with a password in lock-protected rooms.
  7. Meeting Scheduling: Make a time for the meeting and add it to your calendar.
  8. Join previous meetings that have already occurred.
  9. Chat with your group during meetings.
  10. High-quality: Opus and VP8 deliver audio and video with clarity and richness.
  11. Software Options for Recording Meetings
  12. Application in the Cloud
  13. Budget-Friendly Application
  14. Private Database
  15. CodeIgniter(MVC) application built in PHP
  16. Architecture Using the Full-rest API

[Solved] Flutter setState isn’t Defined for the Class (2023)

0
Flutter setState isn't Defined for the Class

If you face any issue like Flutter setstate isnt Defined for the class then this article is for you. We will discuss how to solve the Flutter setState isn’t Defined error on Flutter.

To solve this issue, at first we have to get the idea about following things:

  • Why this Flutter setState isn’t Defined for the class happen?
  • How to Solve this issue?

Why this Flutter setState isnt Defined for the class happen?

If you are trying to keep the setState on a stateless widget then this issue will occur. Stateless widget is immutable which is unable to change. But statful widget is the dynamic and that can changes it’s appearance according to the trigger by user interactions.

If you want to know more about flutter stateful and stateless widget then you can read this article:

What is flutter Stateful and Stateless Widget?

How to Solve Flutter setState isn’t Defined issue?

This issue can be solve by using the stateful widget. Just place the setState inside the Statefull widget.

class MainPage extends StatefulWidget{
  HomePage createState()=> HomePage();
}

class HomePage extends State<MainPage>{
 //Your code here
}

setState is only available inside a stateful widget. So in that case, you need to convert Stateless widget into the Statefull widget.

How is the setState looks like?

setState looks like below:

setState( () {} ) ;

So the solution for Flutter setState isnt Defined issue: Keep your setState function inside the stateful widget.

Example:

class MyHomePage extends StatefulWidget {
  const MyHomePage({Key? key}) : super(key: key);
  @override
  State<MyHomePage> createState() => _MyHomePageState();
}

class _MyHomePageState extends State<MyHomePage> {
  int res = 0;
  @override
  Widget build(BuildContext context) {
    return Scaffold(
        appBar: AppBar(
          title: const Text("FLUTTER SERVICE"),
        ),
        body: Center(
            child: Column(children: <Widget>[
          Container(
            margin: EdgeInsets.all(25),
            child: Text(
              'Result $res',
              style: TextStyle(fontSize: 20.0),
            ),
          ),
          Container(
            color: Colors.blue,
            margin: EdgeInsets.all(25),
            child: TextButton(
              child: const Text(
                'COUNT',
                style: TextStyle(fontSize: 20.0, color: Colors.white),
              ),
              onPressed: () {
                _counter();
              },
            ),
          ),
        ])));
  }
  _counter() {
    setState(() {
      res++;
    });
  }
}

An example of the full code:

import 'package:flutter/material.dart';

void main() {
  runApp(const MyApp());
}

class MyApp extends StatelessWidget {
  const MyApp({Key? key}) : super(key: key);

  @override
  Widget build(BuildContext context) {
    return MaterialApp(
      title: 'Flutter Demo',
      theme: ThemeData(
        primarySwatch: Colors.blue,
      ),
      home: const MyHomePage(),
    );
  }
}

class MyHomePage extends StatefulWidget {
  const MyHomePage({Key? key}) : super(key: key);
  @override
  State<MyHomePage> createState() => _MyHomePageState();
}

class _MyHomePageState extends State<MyHomePage> {
  int res = 0;
  @override
  Widget build(BuildContext context) {
    return Scaffold(
        appBar: AppBar(
          title: const Text("FLUTTER SERVICE"),
        ),
        body: Center(
            child: Column(children: <Widget>[
          Container(
            margin: EdgeInsets.all(25),
            child: Text(
              'Result $res',
              style: TextStyle(fontSize: 20.0),
            ),
          ),
          Container(
            color: Colors.blue,
            margin: EdgeInsets.all(25),
            child: TextButton(
              child: const Text(
                'COUNT',
                style: TextStyle(fontSize: 20.0, color: Colors.white),
              ),
              onPressed: () {
                _counter();
              },
            ),
          ),
        ])));
  }
  _counter() {
    setState(() {
      res++;
    });
  }
}

Output:

 Flutter setState isnt Defined issue

Top 9 Best Flutter UI Kits In 2023

0
10 Best Flutter UI Kits in 2022

We’ll list the top Flutter UI Kits templates and themes in this article. The Kit is available through the link; you can select and download it. Its size, cost, usability, compatibility, and other aspects are taken into consideration when ranking.

1. ProKit

Prokit
Prokit

The Flutter UI kits template called Prokit is very large. It is the best collection of Flutter UI app templates assembled into a premium Flutter UI kits for both Android and iOS developers.

App Templates

Apps for purchasing bus tickets, tests, Social media, eCommerce, food and restaurant delivery, grocery shopping, payment apps, movie and video streaming, learning online, Dating app, blog app, cloud storage, news app, podcast app, banking app, and flutter user interface

People, who read this article also read: Flutter SDK Installation on Windows, macOS, Linux

2. FlutKit

FlutKit
FlutKit

FlutKit is an attractively created and multi-functional Flutter UI Kits template for Flutter. Flutkit can save developers a ton of time because it offers more than 22 complete apps, 200+ ready widgets, and 500+ screens.

App Templates

Application Templates for Shopping, Hotel, Food, Handyman, Course, News, Health, Social, Event, Chat, and Music

3. BigKit

BigKit
BigKit

It offers more than 1000 UI components, which can be used to create elegant and feature-rich hybrid apps. With the Flutter UI Component app, you can get a feature-rich app that is worth the user’s time and attention.

4. DevKit

DevKit
DevKit

DevKit has more than 500 screens in total, many of which are ready for use. It also contains widgets, Cupertino widgets, features, functions, integration, and animation that can be applied to multipurpose apps for iOS and Android devices.

Display Templates

On-Boarding, Sign in, sign up, and verify Password forgotten? Home, User / Account, User Profile, Get in Touch, Product List, Timeline, Notification.

App Templates

Multi-merchant, online food ordering.

5. SmartKit Pro

SmartKit Pro
SmartKit Pro

10+ full app templates, 500% UI screens, 200+ widgets can be found in SmartKit Pro. With its pre-built gorgeously designed screens and widgets, it can save developers a significant amount of time. 

App Templates

Booking appointments at salons, booking trips, dating apps, movie apps, grocery store apps, food ordering apps, bitcoin apps, e-commerce apps, learning apps, and news apps all use the Flutter UI.

6. BigKit Flutter UI Kits

BigKit Flutter UI Kits

20 App Template Source Code, Separate Flutter Projects, Documentation, Free Updates, and 1 New App Every Month are all provided by BigKit.

App Templates

News, music streaming, TikTok, LMS, finance & cryptocurrency, fitness work out, hotel booking, and tour booking, as well as courier delivery, food ordering, home service finder & provider, online banking, multi salon appointment booking, truck tracking admin & driver app, Delivery Boy, Movie, Web Series, and Video Streaming; Job Listing; Fashion Ecommerce; Chat & Group Chat; Matrimony App Template; Ecommerce App Template (Light Mode + Dark Mode with 7 Languages).

7. OneKit

OneKit
OneKit

OneKit is a ready-to-use kit template for Flutter that offers a ton of features and functionalities to make your work simple. It helps you with a good UI and makes your work easier by reducing the amount of time you spend on it.

App Templates

App Flutter UI Kits for retail, education, fitness, and dining.

8. Allinone UI Kit

Allinone UI Kit
Allinone UI Kit

With 300+ screens in total and five or more full app templates, the Allinone UI Kit offers a wealth of pre-made screens, features, functions, integrations, and animations that can be applied to a variety of iOS and Android applications.

App Templates

Supermarket, online shopping, and food delivery streaming video and movies, UI for a dating app.

9. MightyUIKit

Mighty UI Kit
Mighty UI Kit

A powerful 200+ set of Flutter UI screens are offered by Mighty UI Kit, along with complete app templates, widgets that are ready to use, code snippets, readymade code integration, and stunning screens.

App Templates

Garden shopping apps, home service partner apps, smart homes, renter apps, bank apps, and grocery apps are examples.

If you have Shopify stores and looking the page builder then you can read the Top Best Page Builder Apps for Shopify article.

Conclusion

This tutorial provided the 9 best Flutter UI kits. 

Did you know these Flutter UI kits? Do you have any other Flutter UI kits that you want to suggest to others?

Comment your favorite Flutter UI kits below!

People, who read this article also read: Flutter Liquid Swipe Animation

Do you wish to view additional interesting Flutter tutorials?

Free Flutter Color Picker App Template Download in 2023

0
flutter wheel picker

App Name: Free Flutter Color Picker App Template

Google Play Store: Compitable

Apple Store: Compitable

Introduction: This app is made in a flutter to help people with the color they will use in their projects. This is very basic and essential template for a beginner.

Features:

  • Able to pick a color from a picker wheel, palette, value, name, and from the image.
  • favorite to use the later.
  • Copy the clipboard
  • Dark theme compatible.
  • Very responsive, zoomed scaffold expands in screen larger than 950px.
  • Included the tooltips and semantics for accessibility.
  • Support English and Portuguese.

Color Info:

You can parse the color and see the color information:

 SpaceSee infoParseCopy
RGBYesYesYes
HEXYesYesYes
HSLYesYesYes
HSVYesYes 
CielabYesYes 
XYZYes  

Free Download: Free Flutter Color Picker App Template Download

Screenshots:

flutter wheel picker
Wheel Picker
Palette Picker
Palette Picker
Value picker
Value picker
Named Picker
Named Picker
Image picker
Image picker
favorite picker
favorite picker

Image Resources: Github

Free Flutter Movie App Template Download in 2023

0
flutter movie app

App Name: Free Flutter Movie App Template

Google Play Store: Compitable

Apple Store: Compitable

Introduction: This is a very basic and clean architecture level of UI. This project has a beautiful UI with an architectural pattern. You can use this template to create any Flutter Movie App.

Free Download: Free Flutter Movie App Template Download

Screenshots:

flutter movie app
flutter free movie app 2

Install Process:

# clone the repo
git clone https://github.com/marciovalim/flutter-movies-app.git 

# move to the cloned repo
cd flutter-movies-app

# get dependencies
flutter pub get

# run application
flutter run

Image Resources: Github