

In this article, we will learn about what are keys in flutter and when to use it.
We will delve into Keys in this article in Flutter. We’ll explain how to use a reasonable key in your flutter applications at a reasonable time and place in the sentences following (when, where, which).
Table of Contents
What are the keys in Flutter?
Since widgets move around the widget tree, keys are responsible for maintaining state. When changing a collection, it’s used to keep track of the user’s scroll position or to maintain state. If the entire widget subtree is stateless, keys are not necessary. Now let us study when to use the keys.
As is common knowledge, keys are used to keep states intact when widgets are moved around the widget subtree. Therefore, a stateful widget would require keys, whereas a stateless widget would not.
To demonstrate the keys, we will build a simple application in which pressing a button will cause the color of the boxes to change. Using the keys would allow for the storage of the color values. The application developed without the use of keys is represented by the code below.
What are keys in Flutter! How useful are they?
In all but one widget constructor, the key parameters are present; however, their usage is less frequent. When widgets move around in your widget tree, keys keep their state. In actuality, this suggests that they may be helpful in maintaining the user’s scroll position or maintaining state when modifying a collection.
Making Sense of what are keys in Flutter!
Although adding keys to every Flutter widget is possible, doing so isn’t always beneficial. What you need to know about keys is this:
- Given that these widgets hold some state, multiple widgets of the same type and level in a widget tree might not update as expected unless they have distinct keys.
- Setting a key explicitly for a widget aids Flutter in determining which widget to update when a state change occurs.
- Keys can store and restore a list of widgets’ current scroll positions, in addition to other things.
- For better comprehension, think about the following example:
- A corresponding element tree is created when Flutter arranges the widget tree. Each widget in the widget tree is internally mapped to an element in the element tree.
People who read this article also read: Flutter LayoutBuilder Widget Example Step by Step
Each element in the element tree contains information about the UI and the app’s structure, so each element contains specifics about:
- The widget’s runtimeType for that widget in the widget tree.
- A pointer to the corresponding widget in the widget tree.
- The reference is to its child element.
When to use it?
When changing a group of widgets of the same type that are holding a state, keys are frequently used. The majority of the time, we use them on children of widgets, like Listview or Stateful widgets, whose data is constantly changing.
Why to use it?
What are keys in flutter? and how to use it? The key idea is how flutters maintains a reference to state and allows access to it at various times, or keeps it while modifying the widget tree.
Before re-rendering, Flutter checks the previous state, and if the previous widget is the same type as the new one, it will keep the previous state.
If the data is changing, we don’t want this because flutter will continue to use the outdated information. To uniquely identify the widget, we therefore need keys. This is due to the fact that a new widget will have a unique key, destroying the old one.
Key types in Flutter
- Value Key: The value key is used when something constant and extraordinary must be assigned to it. For example, in the To-Do List, the text entered is the value.
- Object Key: The Object key is used when a single field, like a person’s name or birthday, may be the same for more than two people but is different for every individual or every set of data.
- Unique Key: When there are multiple widgets with the same incentive, we must define each widget as a separate item using the unique key. Since we didn’t know what random color would be assigned to it until the widgets were put together, we also used it in our code.
- Global Key: The benefit of using a global key is that it holds data that other widgets in the code can access. Use the Global KeyFrom State>, which stores a form of state and prevents other widgets from accessing the data it contains, if you don’t want to share it with other widgets.
Global keys have two uses.
- In addition, they can be used to access information about another widget in a completely different branch of the widget tree, allowing widgets to change their parents anywhere in the application without losing state.
- In the second scenario, you might need to check the password, but you would prefer not to share the status information with various widgets in the tree, so you can use the GlobalKeyFromState>Hold a formFormOfState.
In actuality, global keys are similar to global variables. The function of global keys can be performed more effectively by inherited widgets, Redux, or block patterns, for example.
How to Use Keys to Prevent Unexpected Results
Flutter can perform an additional comparison in addition to the widget type by adding a key to a widget that stores a reference to the state. By doing this, Flutter makes sure that when the types and keys match, but the keys don’t, the elements are forced to drop to their widget reference. They hold references to widgets that match both the type and key. This ensures that both the widget and state references are properly updated.
The Starter Project’s setup
- Open an existing project by selecting it in Android Studio.
- Then pick the starter folder from the materials you downloaded.
- When you are in this file, click Pub get at the top of the pane to fetch the dependencies listed in pubspec.yaml.
Now that you know what the starter project contains, you’ll take a deeper look at what are keys in flutter and when to use it.
People who read this article also read: How to Use the Flutter Positioned Widget?
Stateless Widget Tree
- We have created the application using the stateless widget in this section of the code.
- PositionedTiles is a new class that is created here.
- The comment you see in this code is for the special color generator, which will generate the colors for the boxes at random.
- The swapTiles function is activated when the button is tapped, and the swapping then occurs. The smiling face at the bottom is the onTap button.
import 'package:flutter/material.dart';
import 'dart:math';

void main() => runApp(new MaterialApp(home: PositionedTiles()));

class PositionedTiles extends StatefulWidget{
@override
State<StatefulWidget> createState() => PositionedTilesState();
}

class PositionedTilesState extends State<PositionedTiles>{
late List<Widget> tiles;

@override
void initState(){
	super.initState();
	tiles = [
	StatelessColorfulTile(),
	StatelessColorfulTile(),
	];
}

@override
Widget build(BuildContext context) {
	return Scaffold(
	appBar: AppBar(
		title: Text("GEEKSFORGEEKS"),
		backgroundColor: Colors.green,
	) ,
	body: SafeArea(child: Row(children: tiles)),
	floatingActionButton: FloatingActionButton(
		child: Icon(Icons.sentiment_very_satisfied), onPressed: swapTiles),
	);
}

swapTiles(){
	setState(() {
	tiles.insert(1, tiles.removeAt(0));
	});
}
}

class StatelessColorfulTile extends StatelessWidget {
Color myColor = UniqueColorGenerator.getColor();
@override
Widget build(BuildContext context) {
	return Container(
		color: myColor, child: Padding(padding: EdgeInsets.all(70.0)));
}
}

//this code snippet tells you how UniqueColorGenerator works
class UniqueColorGenerator {
static List colorOptions = [
	Colors.blue,
	Colors.red,
	Colors.green,
	Colors.yellow,
	Colors.purple,
	Colors.orange,
	Colors.indigo,
	Colors.amber,
	Colors.black,
];
static Random random = new Random();
static Color getColor() {
	if (colorOptions.length > 0) {
	return colorOptions.removeAt(random.nextInt(colorOptions.length));
	} else {
	return Color.fromARGB(random.nextInt(256), random.nextInt(256),
		random.nextInt(256), random.nextInt(256));
	}
}
}
Output:
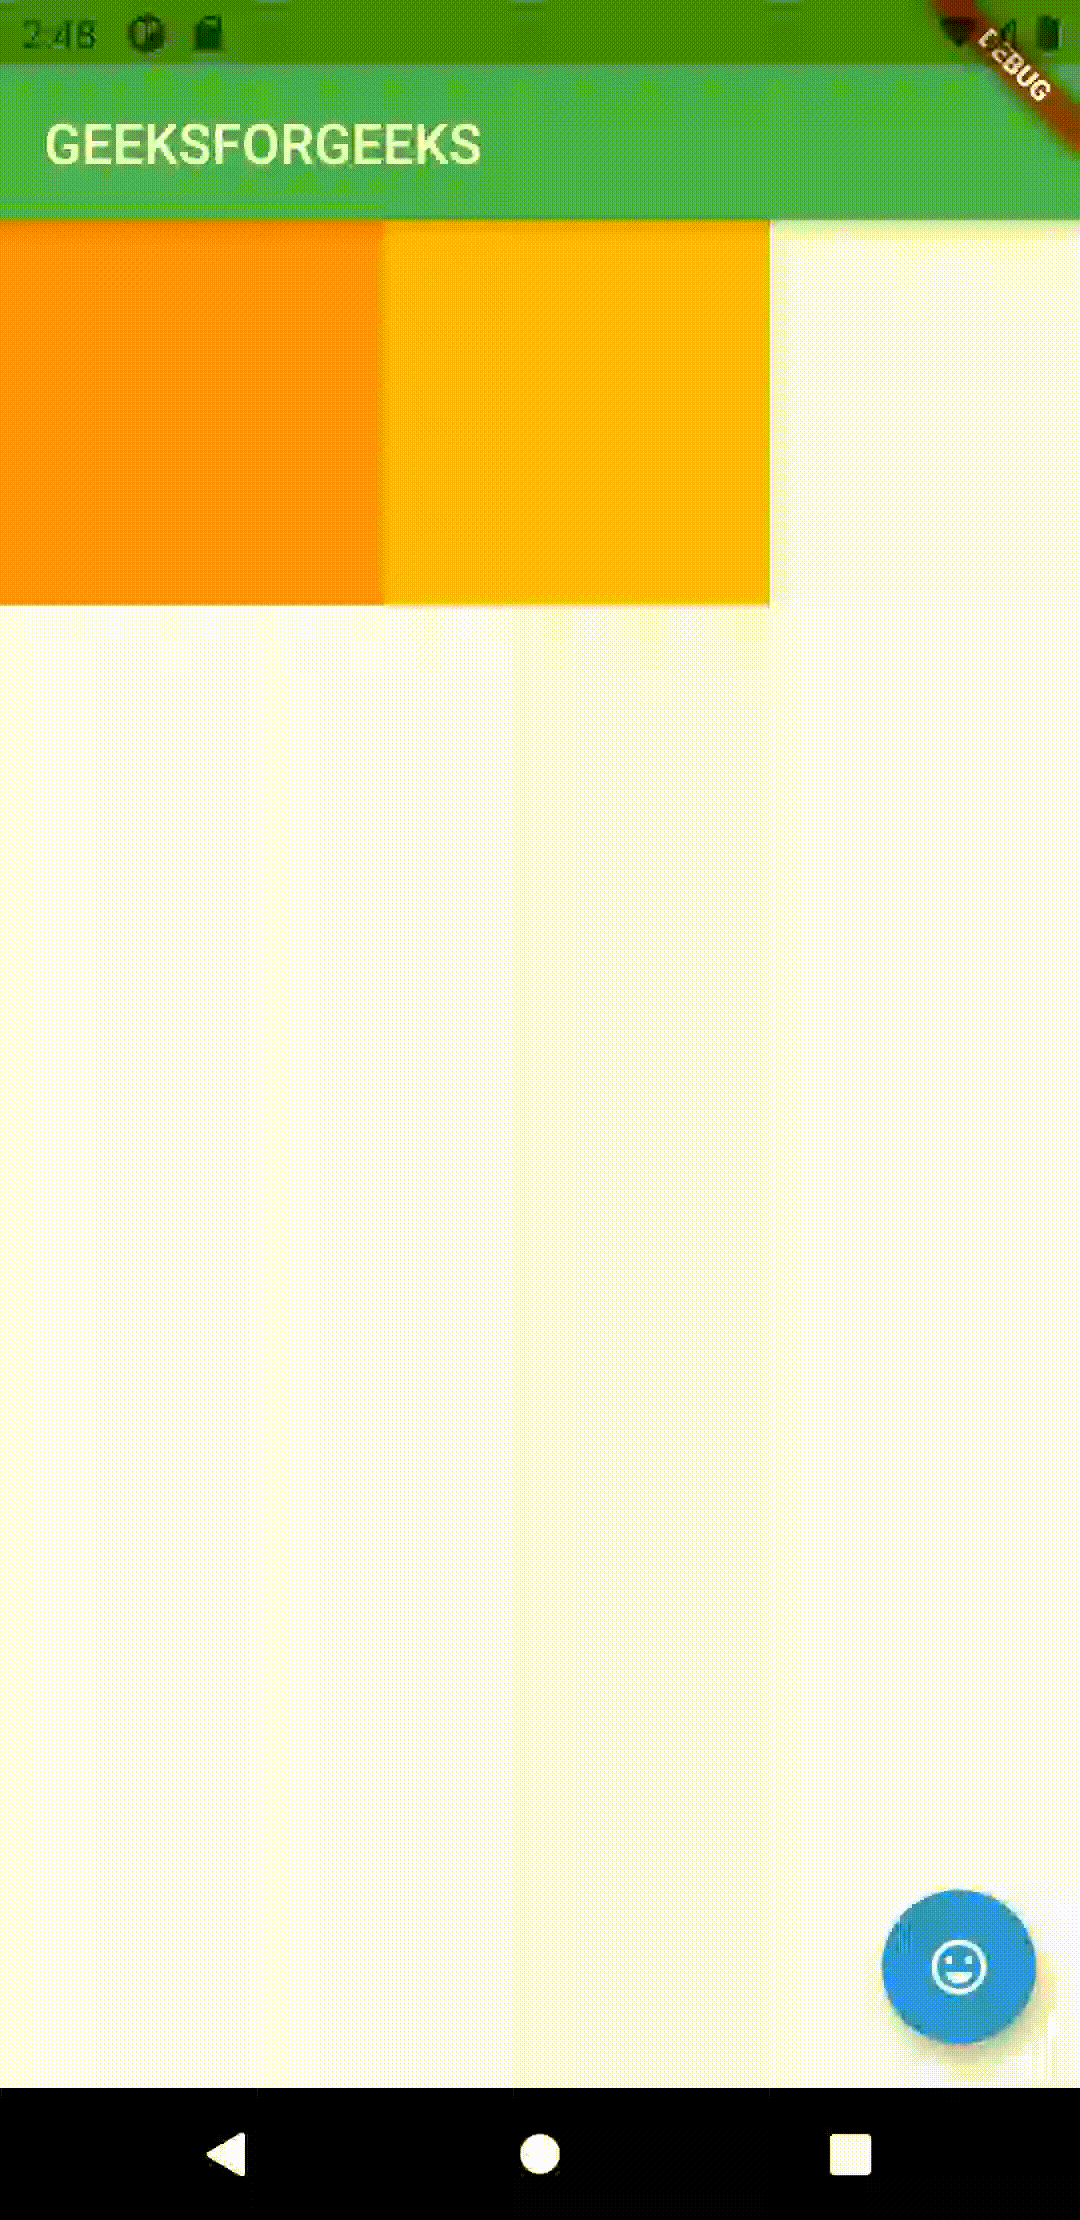
You can see that the colors are changing here, but if we switch to the Stateful widget, the code will still function properly but the application won’t display anything. But as long as we use the keys in this Stateful widget, the application will function properly. Direct with the keyboard is the next code, which is shown below.
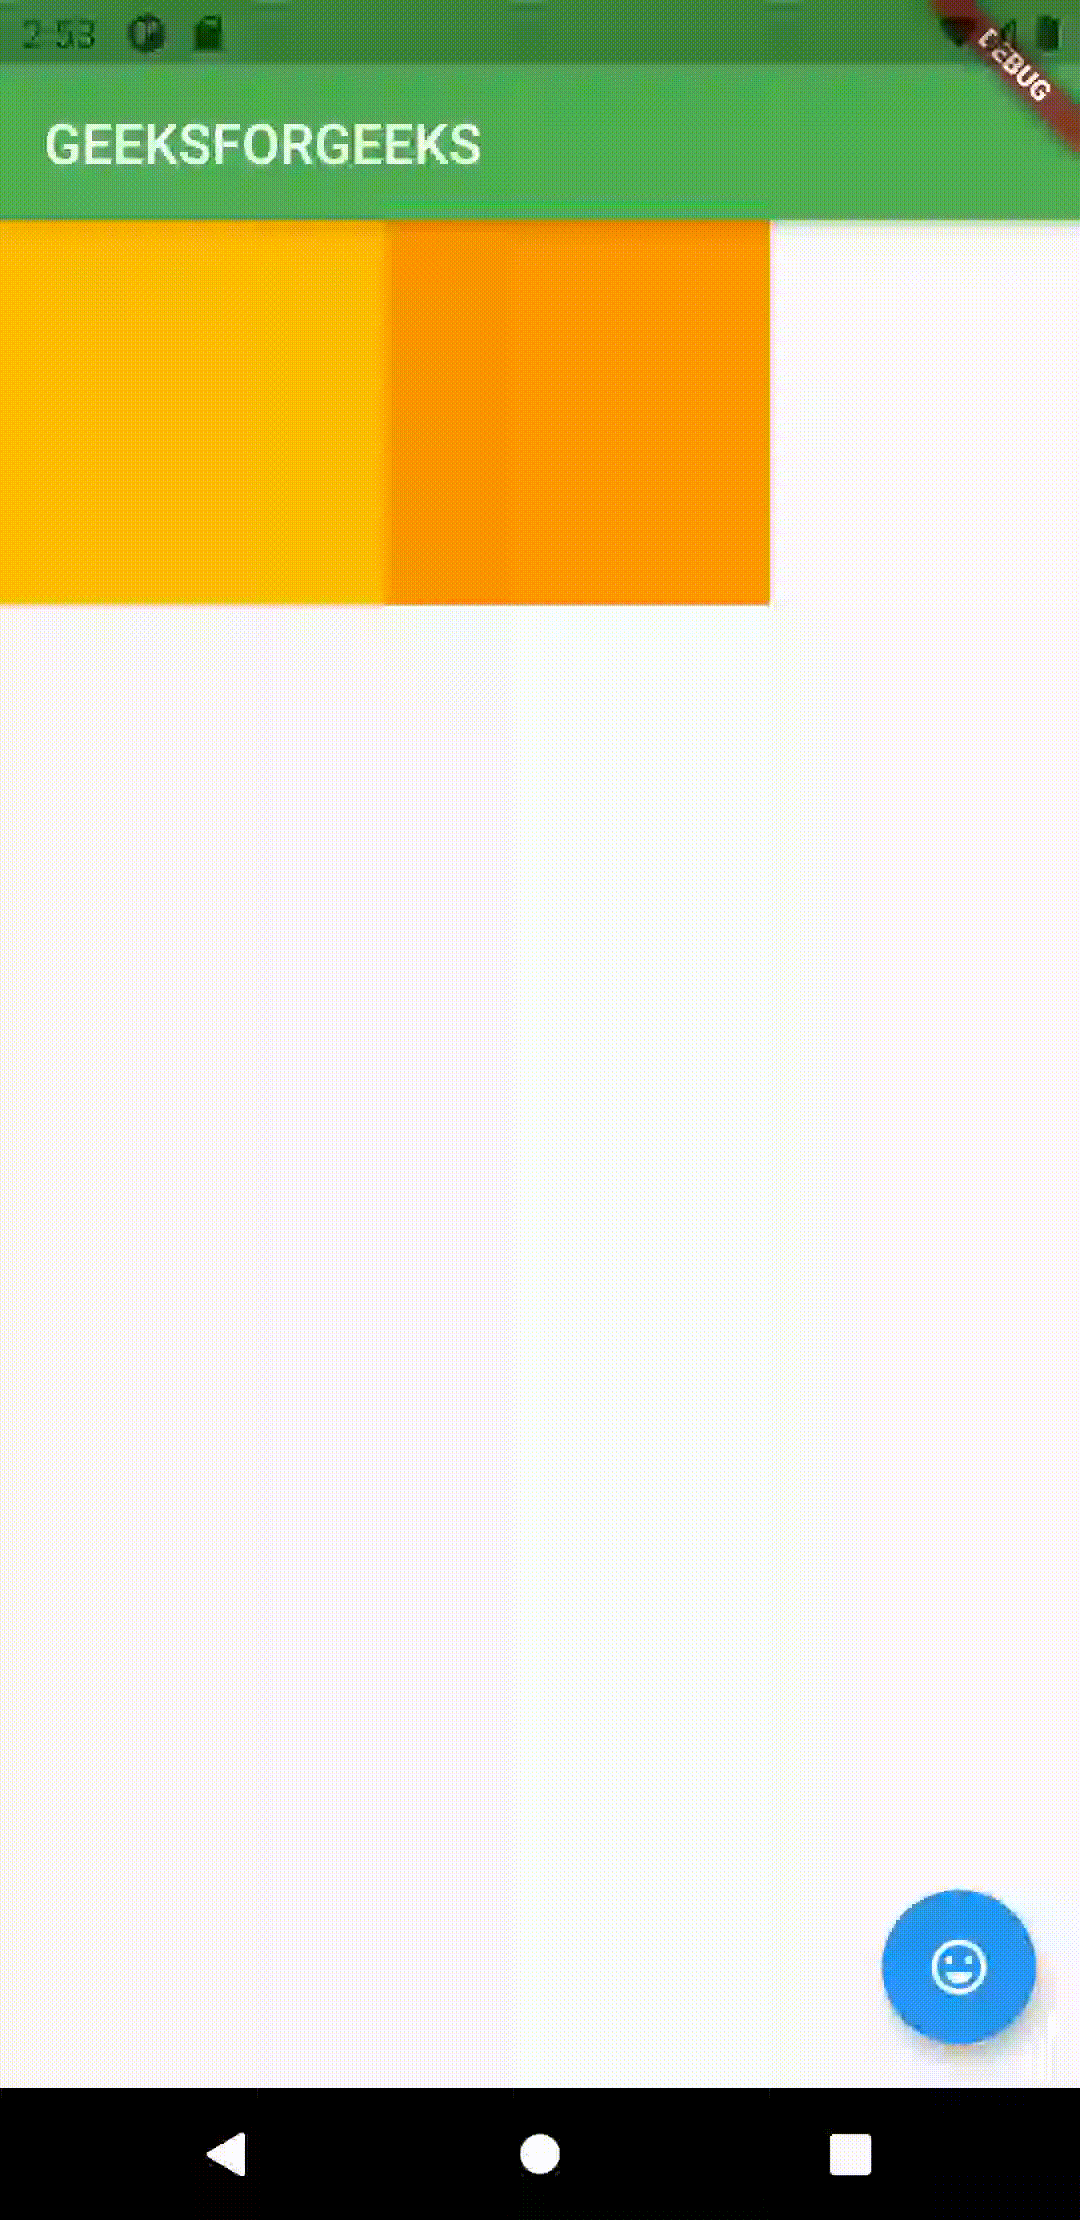
Stateful Widget Tree
As you can see in this code, we have used the keys feature, which is why the application is operating properly. Only the Key feature has been added here; the remaining code is unchanged.
import 'package:flutter/material.dart';
import 'dart:math';

void main() => runApp(new MaterialApp(home: PositionedTiles()));

class PositionedTiles extends StatefulWidget{
@override
State<StatefulWidget> createState() => PositionedTilesState();
}

class PositionedTilesState extends State<PositionedTiles>{
late List<Widget> tiles;

@override
void initState(){
	super.initState();
	tiles = [
	StatefulColorfulTile(key: UniqueKey()),
	StatefulColorfulTile(key: UniqueKey()),
	];
}

@override
Widget build(BuildContext context) {
	return Scaffold(
		appBar: AppBar(
		title: Text("GEEKSFORGEEKS"),
		backgroundColor: Colors.green,
		) ,
	body: SafeArea(child: Row(children: tiles)),
	floatingActionButton: FloatingActionButton(
		child: Icon(Icons.sentiment_very_satisfied), onPressed: swapTiles),
	);
}

swapTiles(){
	setState(() {
	tiles.insert(1, tiles.removeAt(0));
	});
}
}

class StatefulColorfulTile extends StatefulWidget {
StatefulColorfulTile({required Key key}) : super(key: key);
@override
State<StatefulWidget> createState() => StatefulColorfulTileState();
}
class StatefulColorfulTileState extends State<StatefulColorfulTile> {
late Color myColor;
@override
void initState() {
	super.initState();
	myColor = UniqueColorGenerator.getColor();
}
@override
Widget build(BuildContext context) {
	return Container(
		color: myColor,
		child: Padding(
		padding: EdgeInsets.all(70.0),
		));
}
}

class UniqueColorGenerator {
static List colorOptions = [
	Colors.blue,
	Colors.red,
	Colors.green,
	Colors.yellow,
	Colors.purple,
	Colors.orange,
	Colors.indigo,
	Colors.amber,
	Colors.black,
];
static Random random = new Random();
static Color getColor() {
	if (colorOptions.length > 0) {
	return colorOptions.removeAt(random.nextInt(colorOptions.length));
	} else {
	return Color.fromARGB(random.nextInt(256), random.nextInt(256),
		random.nextInt(256), random.nextInt(256));
	}
}
}
Output
Now that we have seen the example above, it is obvious where to add them. The solution is straightforward: if you must use the Stateful widget, then you must use the Keys; otherwise, there is no need to use them.
What am I going to do with them?
Short answer: if you need to add keys to your app, place them at the top of the widget subtree with the state you want to keep.
People frequently make the mistake of believing that they only need to put a key on the first stateful widget, but there are dragons. Still not convinced? To demonstrate how far we can go, I wrapped my colorfulTile widgets in padding widgets but left the keys on the tiles.
void main() => runApp(new MaterialApp(home: PositionedTiles()));

class PositionedTiles extends StatefulWidget {
  @override
  State<StatefulWidget> createState() => PositionedTilesState();
}

class PositionedTilesState extends State<PositionedTiles> {
  // Stateful tiles now wrapped in padding (a stateless widget) to increase height
  // of widget tree and show why keys are needed at the Padding level.
  List<Widget> tiles = [
    Padding(
      padding: const EdgeInsets.all(8.0),
      child: StatefulColorfulTile(key: UniqueKey()),
    ),
    Padding(
      padding: const EdgeInsets.all(8.0),
      child: StatefulColorfulTile(key: UniqueKey()),
    ),
  ];

  @override
  Widget build(BuildContext context) {
    return Scaffold(
      body: Row(children: tiles),
      floatingActionButton: FloatingActionButton(
          child: Icon(Icons.sentiment_very_satisfied), onPressed: swapTiles),
    );
  }

  swapTiles() {
    setState(() {
      tiles.insert(1, tiles.removeAt(0));
    });
  }
}

class StatefulColorfulTile extends StatefulWidget {
  StatefulColorfulTile({Key key}) : super(key: key);

  @override
  ColorfulTileState createState() => ColorfulTileState();
}

class ColorfulTileState extends State<ColorfulTile> {
  Color myColor;

  @override
  void initState() {
    super.initState();
    myColor = UniqueColorGenerator.getColor();
  }

  @override
  Widget build(BuildContext context) {
    return Container(
        color: myColor,
        child: Padding(
          padding: EdgeInsets.all(70.0),
        ));
  }
}
Currently, the tiles change to completely random colors when I click the button!
Output:


Conclusion
You’ve learned the basics of what are keys in flutter and when to use it
Now, I’d like to hear from you: what are keys in flutter and when to use it? Did you think it would be this easy?
This was a brief basic introduction of what are keys in flutter and when to use it. I have described the basic structure of Keys in Flutter in the article; you are free to modify this code as you see fit.
I’m hoping that the information on this blog will be sufficient for you to use in your flutter projects to try out keys. Use theKey when maintaining the widget tree’s state is required. When modifying a list of widgets, for instance, or a collection of the same kind. WillKeySet is placed at the top of the widget tree to show exceptional identity (which picks different kinds of keys). So please try it.
Read More:
How to use the Rive Flutter Animation
Sources: Image and code from geeksforgeeks and flutteragency.


