

In this article, I will show you how to construct the code component in Rive Flutter Animation. Though the logic is pretty similar to React Native.
Rive Flutter is an interactive design and animation tool that works in real-time.
Table of Contents
Introduction to Rive Flutter Animation
You can quickly import your Rive assets to FlutterFlow and use them within your app by using the RiveAnimation widget.
- Rive is a fantastic animation tool that allows us to create beautiful animations that we can then incorporate into our application.
- We can add animations in Flutter by writing a lot of code, but this is not a good practice for a developer.
- This robust Rive animation tool allows us to create animation without having to write lines of code.
Let’s imagine you develop a screen responsible for downloading a significant amount of data. But there’s a problem: how can you keep the users entertained while the files are being sent?
If presenting animations was the first thing that came to mind, you’re not alone! And if you have any questions or are unsure how to get started with Flutter animations, this article should help.
To fully comprehend the topic, please read all the points below in order.
Why should mobile apps have animations?
A clean, appealing interface alone is no longer sufficient to pique users’ interest.
What can you do to persuade people to try your solution?
- Ensure that users have a sense of control.
- They must be aware that their actions have consequences.
- The app should provide feedback to users every time they do something.
- This way, they can quickly learn how to use your product and are more likely to open the app in the future.
What other advantages can animations provide?
- They use information about the sale, for instance, to direct the user’s attention to a particular location.
- They also ensure that the sequential screens transition smoothly.
- As a result, there is a higher likelihood of creating a satisfying user experience.
- Particularly if the animations relate to the products you sell and have a design that matches your branding elements.
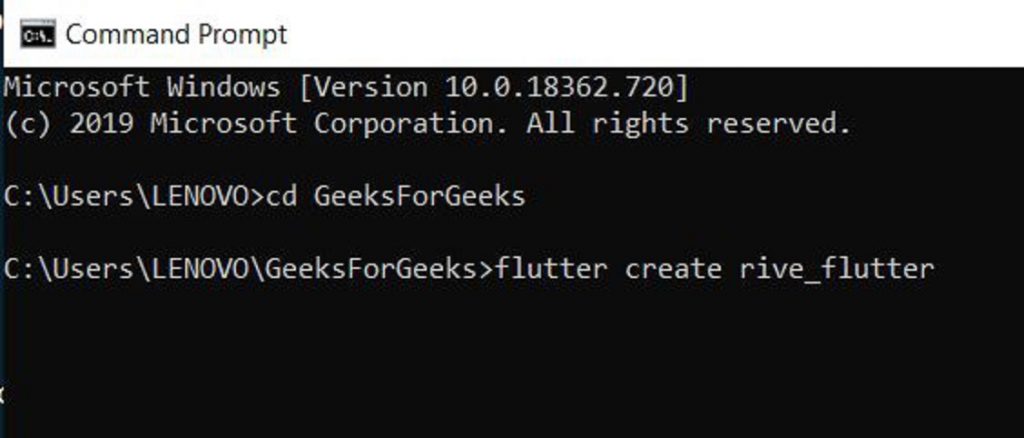
Beginning with Flutter
- The command Prompt can be used to create a new Flutter application. For creating a new app, write flutter create YOUR_APP_NAME and run this command.
- Launch the application in Android Studio or VS Code. I am using VS Code.
- For the time being, remove the default code from main.dart.
- Now it’s time to make a new animation. Go ahead to https://rive.app/explore/popular/trending/all.
- Additionally, you can export animations that other users have made.
- “Open in Rive” will appear when you click any animation.
- Then download it by clicking the export button.
- The file extension and format should be.flr and Binary, respectively.
- Now, open VS Code and create a new folder “assets” in the application’s root directory and paste the files you downloaded from rive. In the asset’s folder, I have four files.
Animation Design
Using Rive Flutter Editor, you can start from scratch to create an animation.
- Select + New File.
- Set the width and height of the artboard.
- Then, select Create.
To begin creating your animation, use the Rive Flutter design tools or import image files. Once your design is complete, you can use the timeline.
People also read: How to Use the Flutter Positioned Widget?
Inserting the RiveAnimation widget for Rive Flutter
To use a Rive animation, follow these instructions:
- Onto the canvas, drag and drop the RiveAnimation widget.
- Choose Network or Asset as the Animation Source.
- Enter the path (download URL) of the animation if the network is in selection.
- Get the route by choosing the Rive Flutter animation that is in the community, then selecting the Download button and selecting Copy Link Address from the menu that appears.
- Considering you chose Asset,
- From the drop-down menu, select an artboard.
- Choose the animations you want to use (these were imported from the Rive Flutter asset). You can play one or more animations after selecting them with the Preview Animations button.
- By default, the animation type is set to once. You will have the option to choose Continuous if the animations you’ve chosen have loops or boomerangs. If the animation has a loop, selecting this option will make it play continuously.
- The Auto Animate checkbox is left checked by default, which means that the animation will begin as soon as the page loads. Uncheck this if you want to use an action to initiate the animation.
- Set the RiveAnimation widget’s width and height, and then select a Box Fit type.
(Optional) If you intend to use an Action to trigger the animation, you can give this RiveAnimation widget an appropriate Name so that it is easily identifiable.
How does Flutter aid in the production of animations?
To create effective animations that are also aesthetically pleasing, Flutter is the ideal tool. Your imagination is the only limit. In order to create a cross-platform app, let’s now talk about how to add an animation.
Types of Flutter Animation
Explicit and implicit animations are the two main categories of animations (or rather, their types).
What distinguishes them from one another?
Implicit Animation
You can select an implicit animation if it depends only on a widget’s available variables (like size or color). As a result, you employ Flutter’s pre-installed widgets, such as AnimatedContainer, AnimatedOpacity, AnimatedCrossFade, and numerous others.
When the given value changes, the animation is created.
Explicit Animation
Explicit animations require you to set their behavior on your own, so you must do so. These animations make use of AnimationController. Their advantage is that they provide more options than the implicit type while maintaining all of its functionalities.
Animation Techniques
I should mention that the platform supports three types of animation:
- One-shot – one-time display of the animation
- Ping-pong – an infinite display of animation in a sequence from beginning to end.
- Loop – displays the animation indefinitely from the beginning.
From the code level, Rive Flutter gives you the option to modify the animation’s presentation. The state machine in Rive Flutter allows you to influence which animations the state machine plays by allowing you to make changes to the animations you create.
The animation that should be shown during the day is changed when the button is tapped, for instance, from the one that appears at night. In the animation’s state machine, it switches from day to night at the same time.
Animating a jumping square
You can now start coding.
- Create a StatefulWidget-based BouncingAnimationWidget to begin building Flutter animation.
- Use the SingleTickerProviderStateMixin for this purpose.
- It’s a mixin that controls how often the animations are refreshed.
- It ensures Ticker, which allows Flutter’s engine to display animations at 60 frames per second.
- The AnimationController—the entity in charge of overseeing everything—is then declared.
class BouncingAnimationWidget extends StatefulWidget {
 const BouncingAnimationWidget({Key? key}) : super(key: key);
 @override
 State<BouncingAnimationWidget> createState() =>
     _BouncingAnimationWidgetState();
}
class _BouncingAnimationWidgetState extends State<BouncingAnimationWidget>
   with SingleTickerProviderStateMixin {
 late final AnimationController _controller;
 @override
 void initState() {
   super.initState();
   _controller = AnimationController(
     duration: const Duration(milliseconds: 500),
     vsync: this,
   );
 }
@override
 Widget build(BuildContext context) {
   return Scaffold();
 }
 @override
 void dispose() {
   _controller.dispose();
   super.dispose();
 }
}
Now that you have a square with a shadow, you can start animating it.
Stack(
         alignment: Alignment.center,
         children: [
           _boxShadow(context),
           Align(
             alignment: Alignment(0.0, _boxJumpHeight.value),
             child: _animatedBox(context),
           ),
         ],
       ),

Widget _boxShadow(BuildContext context) => Container(
       width: 180,
       height: 15,
       decoration: BoxDecoration(
         borderRadius:
             BorderRadius.all(Radius.elliptical(180, 15)),
         boxShadow: [
           BoxShadow(
             color: Colors.black.withOpacity(0.15),
             spreadRadius: 5,
             blurRadius: 4,
             offset: const Offset(0, 3),
           ),
         ],
       ),
     );

 Widget _animatedBox(BuildContext context) => Container(
         width: 160,
         height: 50,
         color: Colors.white,
       );
Next, add the animations by spacing them out at specific intervals.
void _initJumpAnimation() => _boxJumpHeight = Tween<double>(
       begin: -0.07,
       end: -0.5,
     ).animate(
       CurvedAnimation(
         parent: _controller,
         curve: const Interval(
           0.0,
           1.0,
           curve: Curves.easeInOut,
         ),
       ),
     );

 void _initBoxRotationAnimation() => _boxRotationAngle = Tween<double>(
       begin: 0,
       end: 360,
     ).animate(
       CurvedAnimation(
         parent: _controller,
         curve: const Interval(
           0.25,
           1.0,
           curve: Curves.ease,
         ),
       ),
     );

 void _initBoxWidthAnimation() => _boxWidth = Tween<double>(
       begin: 160,
       end: 50,
     ).animate(
       CurvedAnimation(
         parent: _controller,
         curve: const Interval(
           0.05,
           0.3,
           curve: Curves.ease,
         ),
       ),
     );

 void _initBoxShadowWidthAnimation() => _boxShadowWidth = Tween<double>(
       begin: 180,
       end: 50,
     ).animate(
       CurvedAnimation(
         parent: _controller,
         curve: const Interval(
           0.05,
           0.5,
           curve: Curves.ease,
         ),
       ),
     );

 void _initBoxShadowIntensityAnimation() =>
     _boxShadowIntensity = Tween<double>(
       begin: 0.15,
       end: 0.05,
     ).animate(
       CurvedAnimation(
         parent: _controller,
         curve: const Interval(
           0.05,
           1.0,
           curve: Curves.ease,
         ),
       ),
     );
When the animations are already there, give users the option to run them concurrently with the rectangle’s rotation. The static values ought to switch to those governed by the specific animations.
The widget now ought to appear as follows:
class BouncingAnimationWidget extends StatefulWidget {
 const BouncingAnimationWidget({Key? key}) : super(key: key);

@override
 State<BouncingAnimationWidget> createState() =>
     _BouncingAnimationWidgetState();
}

class _BouncingAnimationWidgetState extends State<BouncingAnimationWidget>
   with SingleTickerProviderStateMixin {
 late final AnimationController _controller;
 late final Animation<double> _boxJumpHeight;
 late final Animation<double> _boxWidth;
 late final Animation<double> _boxShadowWidth;
 late final Animation<double> _boxShadowIntensity;
 late final Animation<double> _boxRotationAngle;

 @override
 void initState() {
   super.initState();
   _controller = AnimationController(
     duration: const Duration(milliseconds: 500),
     vsync: this,
   );
   _initJumpAnimation();
   _initBoxWidthAnimation();
   _initBoxShadowWidthAnimation();
   _initBoxShadowIntensityAnimation();
   _initBoxRotationAnimation();
 }
 // Insert init functions from the last paragraph here
 @override
 Widget build(BuildContext context) => AnimatedBuilder(
       builder: (context, _) => _buildAnimation(context),
       animation: _controller,
     );

 Widget _buildAnimation(BuildContext context) => GestureDetector(
       onTap: _playAnimation,
       child: Stack(
         alignment: Alignment.center,
         children: [
           _boxShadow(context),
           Align(
             alignment: Alignment(0.0, _boxJumpHeight.value),
             child: _animatedBox(context),
           ),
         ],
       ),
     );

 Future<void> _playAnimation() async {
   try {
     await _controller.forward().orCancel;
     await _controller.reverse().orCancel;
   } on TickerCanceled {
     // the animation got canceled
   }
 }

 Widget _boxShadow(BuildContext context) => Container(
       width: _boxShadowWidth.value,
       height: 15,
       decoration: BoxDecoration(
         borderRadius:
             BorderRadius.all(Radius.elliptical(_boxShadowWidth.value, 15)),
         boxShadow: [
           BoxShadow(
             color: Colors.black.withOpacity(_boxShadowIntensity.value),
             spreadRadius: 5,
             blurRadius: 4,
             offset: const Offset(0, 3),
           ),
         ],
       ),
     );

 Widget _animatedBox(BuildContext context) => Transform(
       alignment: Alignment.center,
       transform: _boxRotation(_controller.status),
       child: Container(
         width: _boxWidth.value,
         height: 50,
         color: Colors.white,
       ),
     );

 Matrix4 _boxRotation(AnimationStatus animationStatus) {
   // This will ensure that rotation will be in the same direction on reverse
   if (animationStatus == AnimationStatus.reverse) {
     return Matrix4.identity()..rotateZ(-_boxRotationAngle.value * pi / 180);
   } else {
     return Matrix4.identity()..rotateZ(_boxRotationAngle.value * pi / 180);
   }
 }

 @override
 void dispose() {
   _controller.dispose();
   super.dispose();
 }
}
Output
Making use of animations in the app
You must use the Rive Flutter developers’ package once the animations have been created. Launch a new project, add an asset to it, then build a widget that will download the animation (from the file or the web).
class FlutterServiceWidget extends StatefulWidget {
 const HoldappLogoRiveWidget({Key? key}) : super(key: key);

 @override
 State<HoldappLogoRiveWidget> createState() => _HoldappLogoRiveWidgetState();
}

class _FlutterServiceWidgetState extends State<HoldappLogoRiveWidget>
   with SingleTickerProviderStateMixin {
 Artboard? _riveArtboard;

 @override
 void initState() {
   super.initState();
   rootBundle.load('assets/holdapp_logo.riv').then((data) {
     // Load the RiveFile from the binary data.
     final file = RiveFile.import(data);

     // The artboard is the root of the animation
     // and gets drawn in the Rive widget.
     final artboard = file.mainArtboard;
     var controller =
         StateMachineController.fromArtboard(artboard, 'State Machine 1');
     if (controller != null) {
       artboard.addController(controller);
     }
     setState(() => _riveArtboard = artboard);
   });
 }

 @override
 Widget build(BuildContext context) => Scaffold(
       backgroundColor: Colors.white,
       body: _riveArtboard != null
           ? Rive(artboard: _riveArtboard!)
           : const Center(
               child: CircularProgressIndicator(),
             ),
     );
}
Output:
Conclusion
You’ve learned the basics of how to utilize Rive Flutter Animation
Now, I’d like to hear from you: Do you know how to use Rive flutter? Did you think it would be this easy?
Rive Flutter enables developers to produce stunning, interactive animations and deliver them to any platform. Because of their open-source runtimes, creators can create animations once and then publish them on any platform they choose.
This, however, wasn’t always the case. The team initially spent a significant amount of time managing the development cycle, including maintaining various client-side web packages for a large portion of the UI functionality, a custom build process, custom dev ops, custom testing, linting, language servers, and more — all from separate packages that required maintenance and constant updating.
Either way, let me know by leaving a quick comment below.
In this Flutter Tutorial, we learned about Rive and how to use it with examples from various circumstances.
Sources: holdapp websites.
Read More:


