

Flutter SDK Installation on Windows
Start creating apps by installing Flutter on your Windows operating system. You need the following minimum equipment before you can install Flutter on Windows:
| Operating Systems | Windows 7 SP1+ (64-bit), x86-64 based |
| Disk Space | 1.32 GB (It does not include disk space for IDE/tools) |
| Windows Tools | Windows PowerShell 5.0, Git for Windows 2.x |
| IDE | Android Studio (Official), Visual Studio Code |
| SDK | Android SDK, Flutter SDK |
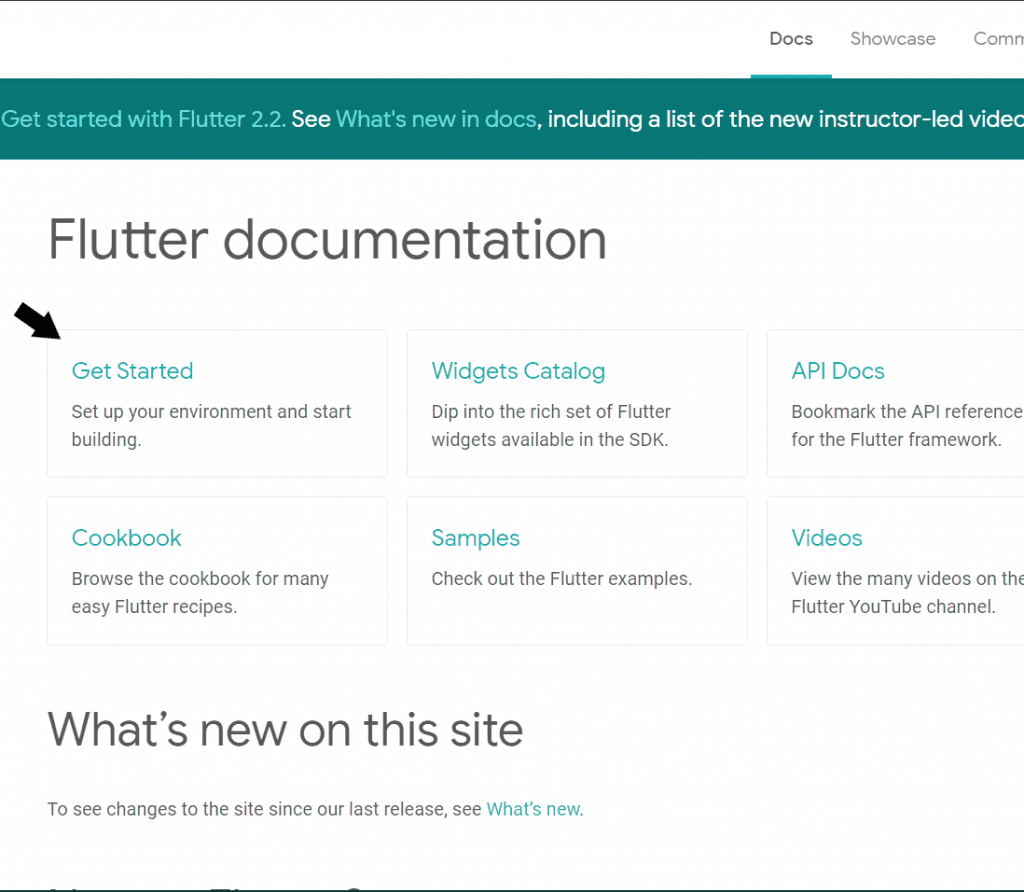
Flutter is essentially Google’s portable user interface (UI) toolkit, which can be used to create attractive, natively-built applications for mobile, desktop, and the web from a single codebase.
In the case of Git for Windows, you should ensure that you can execute git commands from the command line or PowerShell.
Having installed all these tools on your Windows OS, it’s time for Flutter SDK installation on Windows. Visit the Flutter SDK’s official site to download and install it.
Table of Contents
Flutter SDK Installation Process on Windows:
Follow the below steps to install Flutter on Windows:
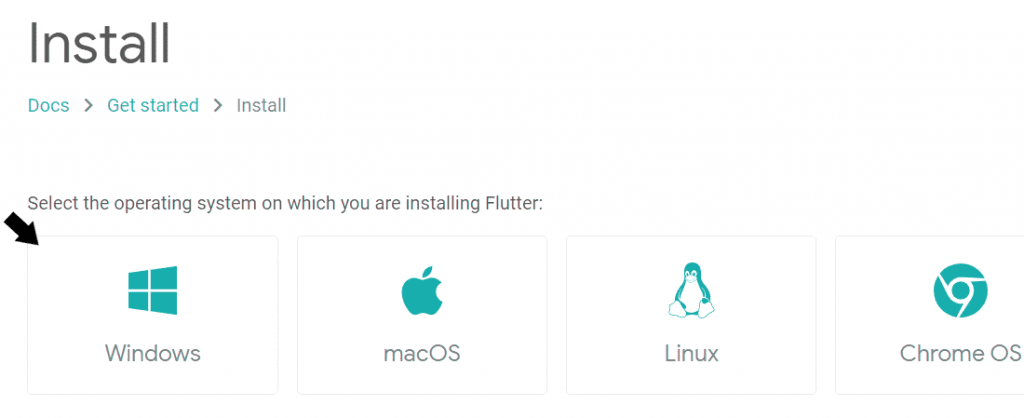
- Navigate to flutter.dev on your webpage.
- On the top menu bar, select Docs > Get Started > Install > Windows.
Git and PowerShell
- Once Git has been installed on your Windows computer, restart the system. The next step is the Flutter Software Development Kit (Flutter SDK) installation on Windows. Download the latest version (as of today) by clicking the link below.
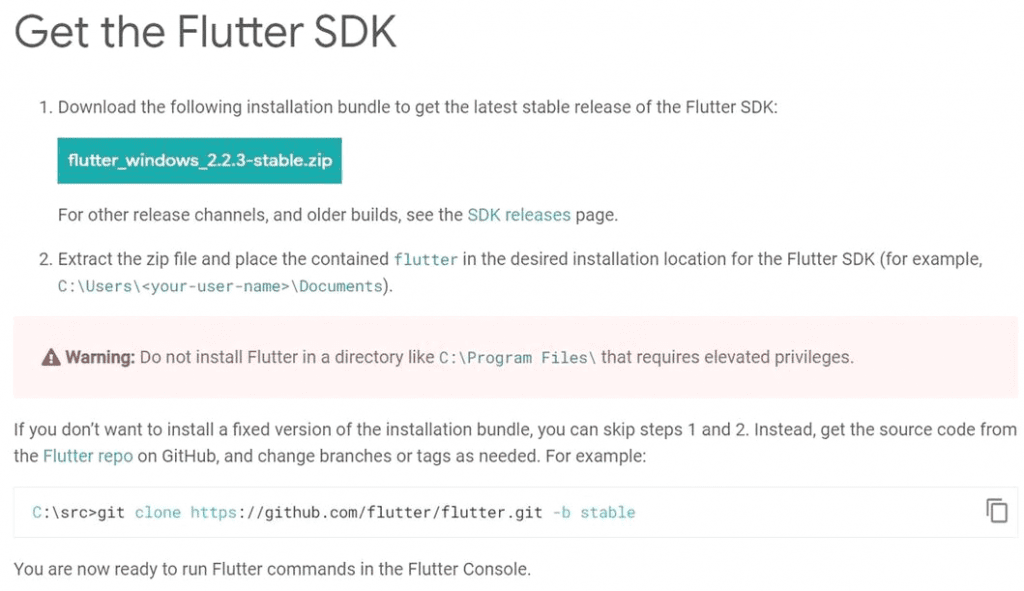
- This tool allows us not only to build flutter projects but also to transform them into native mobile applications. The main tool for creating a flutter UI is the Flutter SDK, to put it simply.
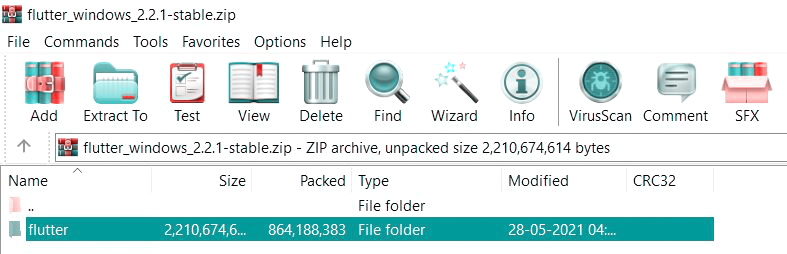
- Once the zip file has been downloaded, extract the “flutter” folder (drag and drop) to any system path or directory where you have read-write access. Due to permission issues, it is usually preferable to make a new folder in a different directory from the system drive (in my case, the target location is F: > development > flutter).
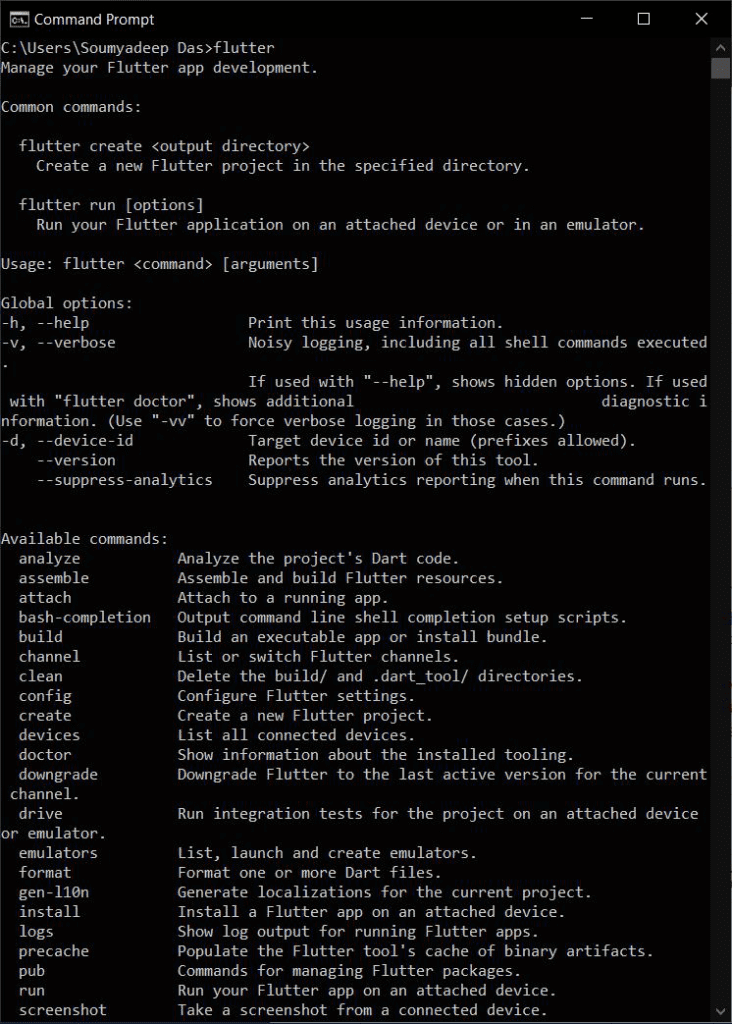
- Right-click the “flutter” folder twice to start over. Open a command prompt window by double-clicking the file named “flutter_console.bat.” It should look something like this:
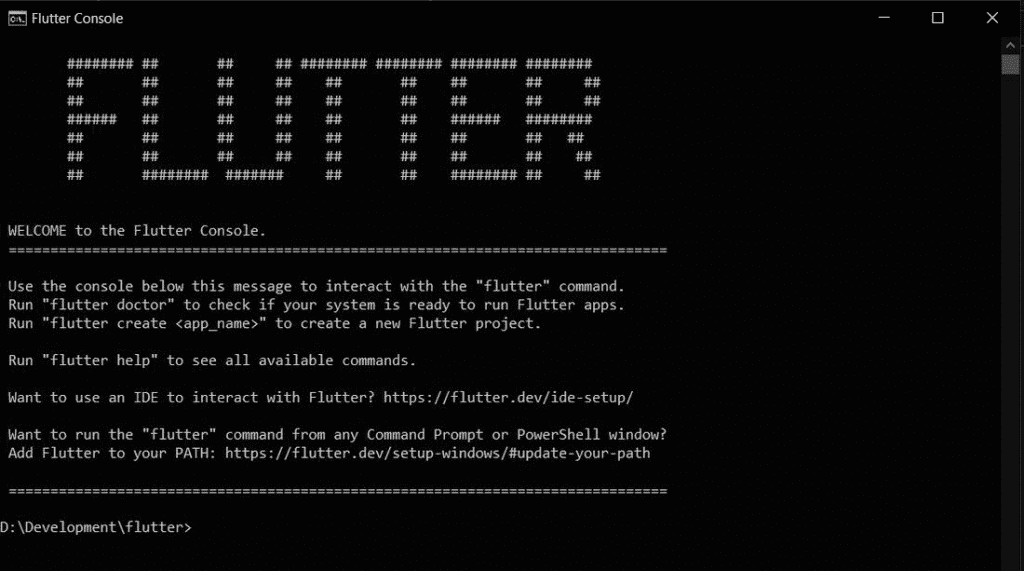
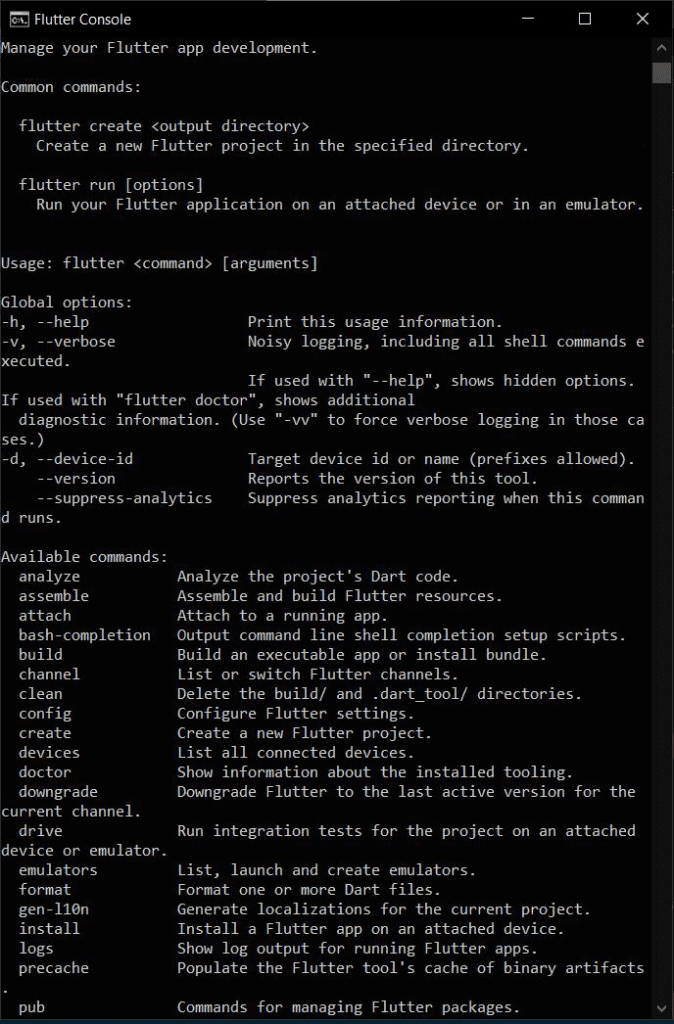
- This console is actually a Windows terminal that the developer can use to execute flutter commands. A list of all available flutter commands can be obtained by typing “flutter.”
Even though having a terminal to run flutter commands and create projects is useful, it would still be better and more convenient to store all of our flutter projects somewhere else on our system for easy access. Let’s continue on our journey!
People, who read this article also read: Flutter Liquid Swipe Animation
Configuring Flutter SDK for the First time
- Examine and modify environment variables to gain access to the entire system. On the flutter installation page’s official Docs page, scroll down to “Update your path” for instructions. You can do this by going to Control Panel > System and Security > System > Advanced System Settings > Environment Variables… On your screen, a dialog box with a list of the accessible environment variables appears.
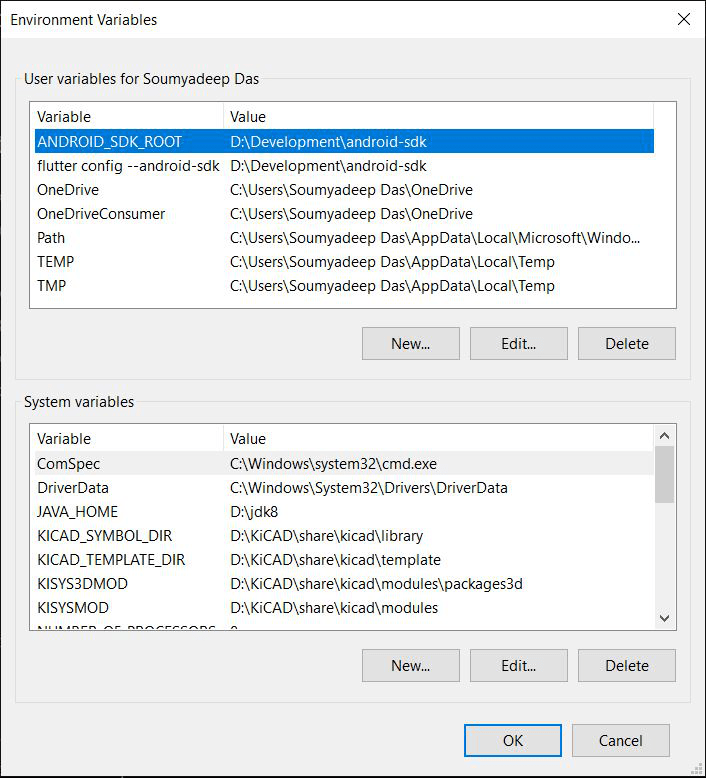
- Environment variables are global system variables that are present at the root level and help configure different parts of Windows. The flutter tool will now be unlocked for use across all of your system’s PowerShell and Command Prompt instances and added as an environment variable for direct access (rather than being launched via the .bat executable).
Look over the following steps to accomplish this:
- Under the list of User Variables, look for the ‘Path’ variable. Create a new variable (‘New…’). If it isn’t already there, create it and set its value to the ‘flutter\bin’ directory.
- In order to add a new entry, double-click on a column below the variable labeled “Path.” It should look something like this:
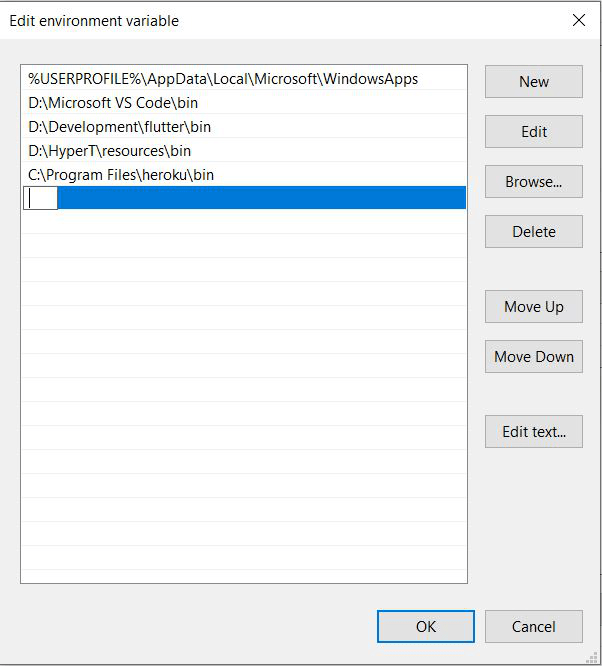
- Copy the directory of the flutter\bin folder in its entirety, then paste it in the path. To finish the setup, click “Ok” twice. Ensure that all open Command Prompt/Windows PowerShell windows have been closed at this point.
Now determine if your flutter framework is accessible from anywhere in the world. To accomplish this, launch any terminal (such as Command Prompt) and type “flutter” to see if you receive the same list of commands as you did earlier from the.bat terminal. If so, your system has been successfully configured to use flutter at the root level. If not, you should think about running the setup again.
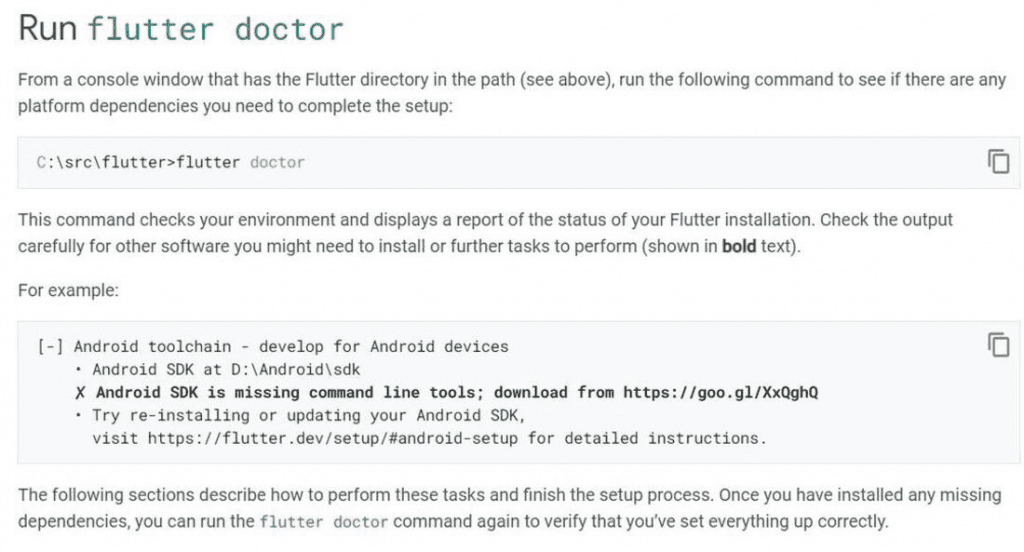
Analyzing the Application
The next step is to analyze and determine what is needed and what needs to be installed. Enter “Flutter Doctor” in the Command Prompt terminal to check for any additional requirements.
Here’s what the previous version looked like:
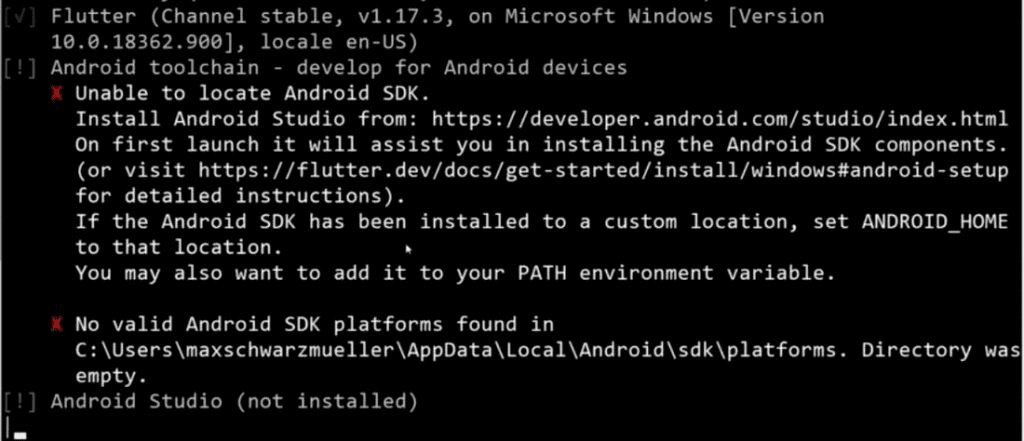
The flutter doctor check indicates that flutter was successfully installed on our system, but the Android tools and Android Studio are not present. Additionally, we observe that there are no connected devices. In order to run the flutter apps you created, the following step entails installing Android tools on your device.
Installing Android Tools for Flutter SDK installation on Windows
Installing Android emulators and tools on Android devices.
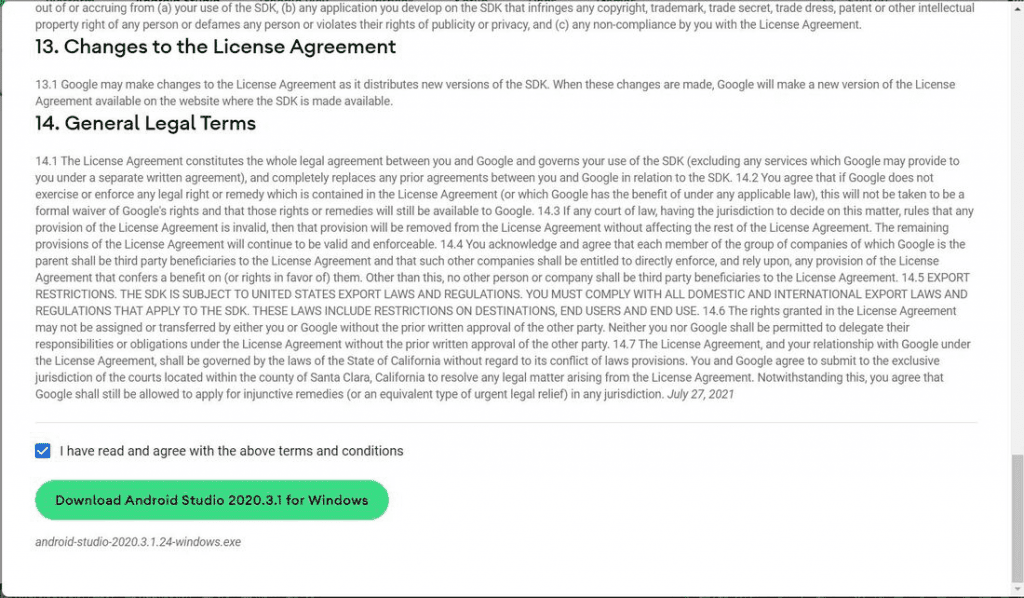
- Downloading and installing Android Studio is the first step. To do this, go to the Android Studio official website and select “Download Android Studio.”
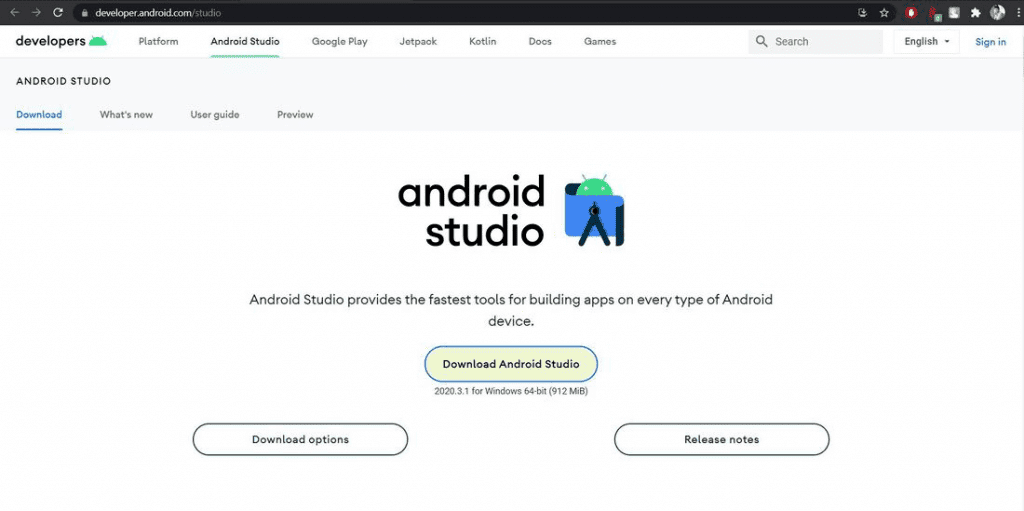
- You can proceed once you have accepted the license agreements. To initiate the download, click the last download button.
The next step is the Flutter SDK installation on Windows after the download is finished.
Flutter SDK Installation on Windows
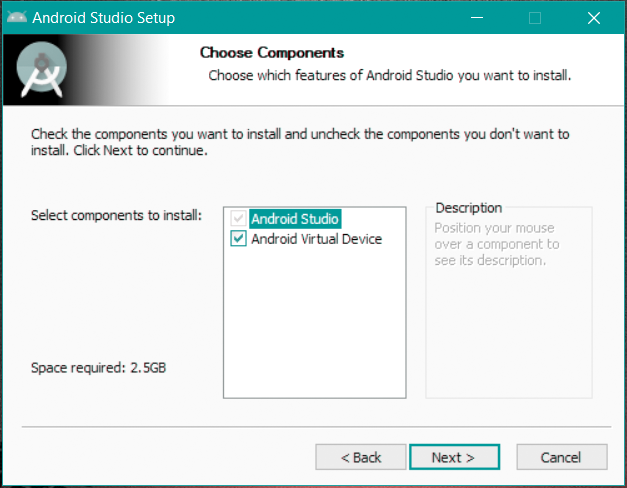
Before continuing, make sure that Android Studio and Android Virtual Device are both selected under “Components.” Running different kinds and sizes of Android emulators to test your flutter project requires the Android Virtual Device, which is a crucial tool. Go ahead and click “Next.”
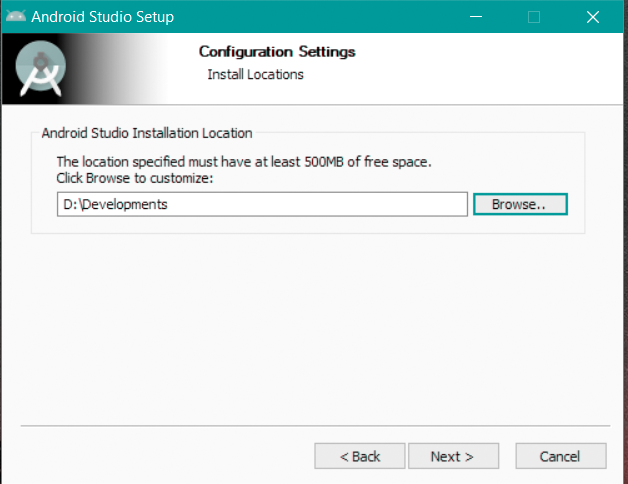
Choose the directory you want to install your file in. A different path other than the system drive should be chosen, it is advised. Once done, click on ‘Next‘.
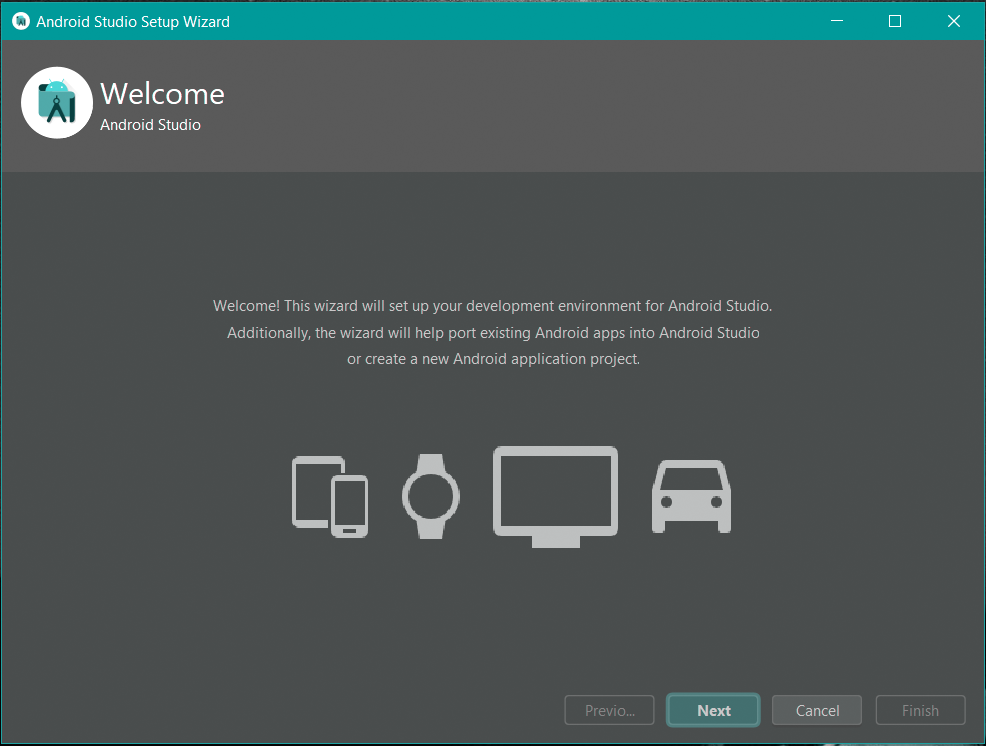
Select “Install” at the end. The installation won’t be finished for a few seconds. You should select the “Launch Android Studio” checkbox. Click on “Finish.”
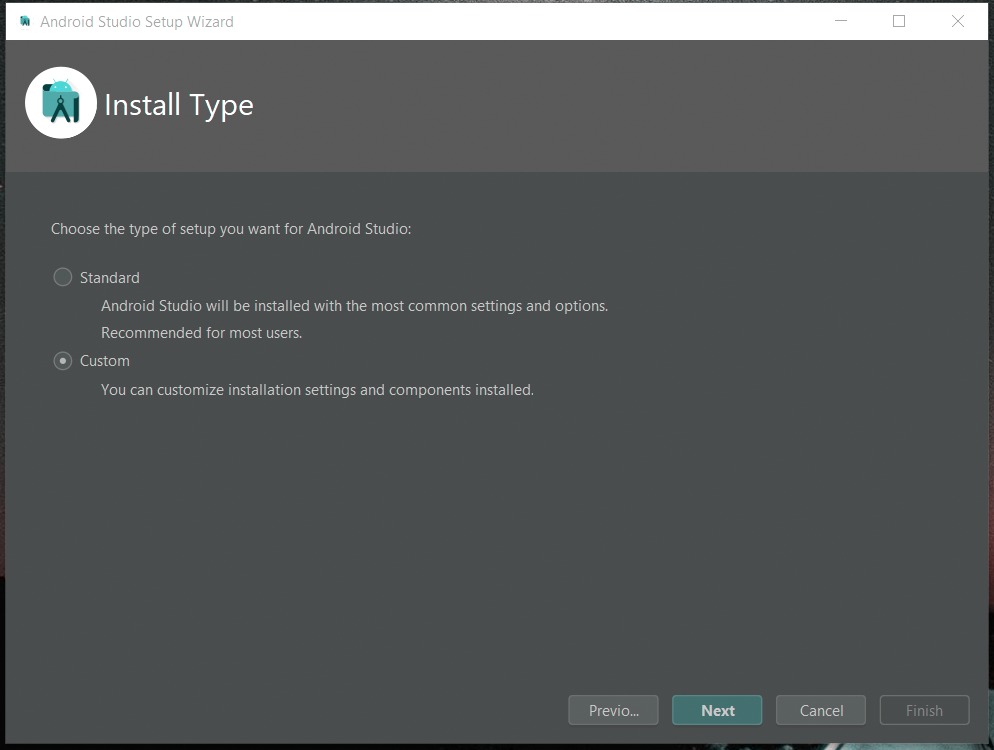
Wait for Android Studio to start up on your computer. Next > Custom > Next must be selected from the home screen.
To save time and trouble, it is advised to use the default path for the Java Development Kit location in the following step. The UI appearance you want for Android Studio should be selected in the following step. Click ‘Next‘.
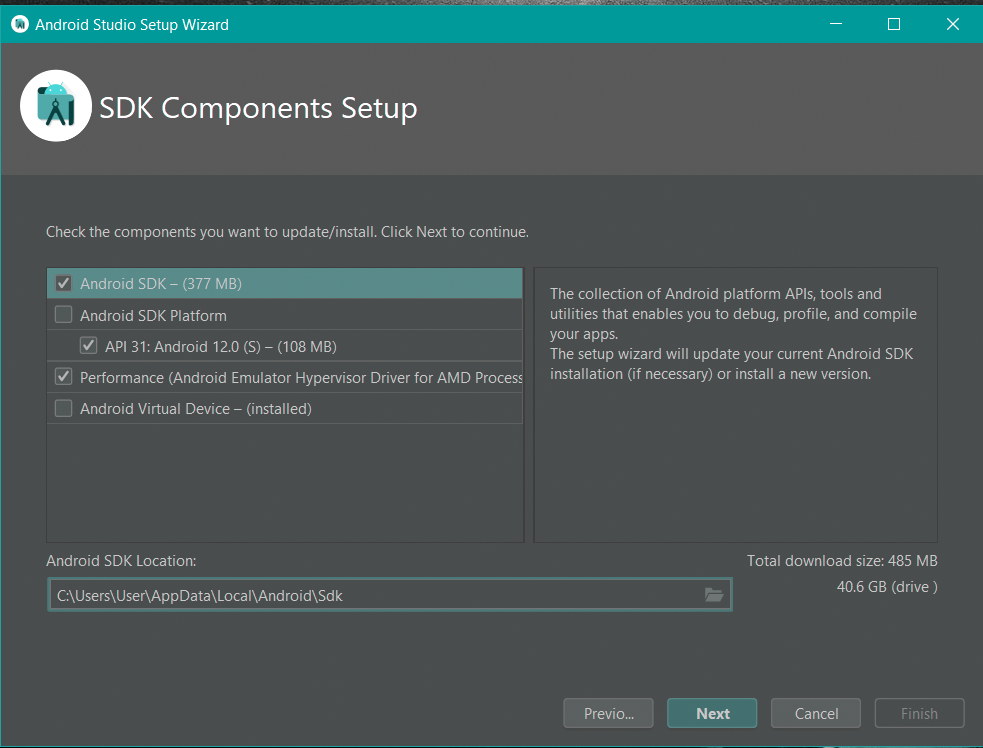
The following action is somewhat significant. Keep in mind to check all the necessary boxes precisely as they are shown below. Those kits that have already been installed can be disregarded, and you can continue. Choose “Next.” You can choose the Android SDK folder you want.
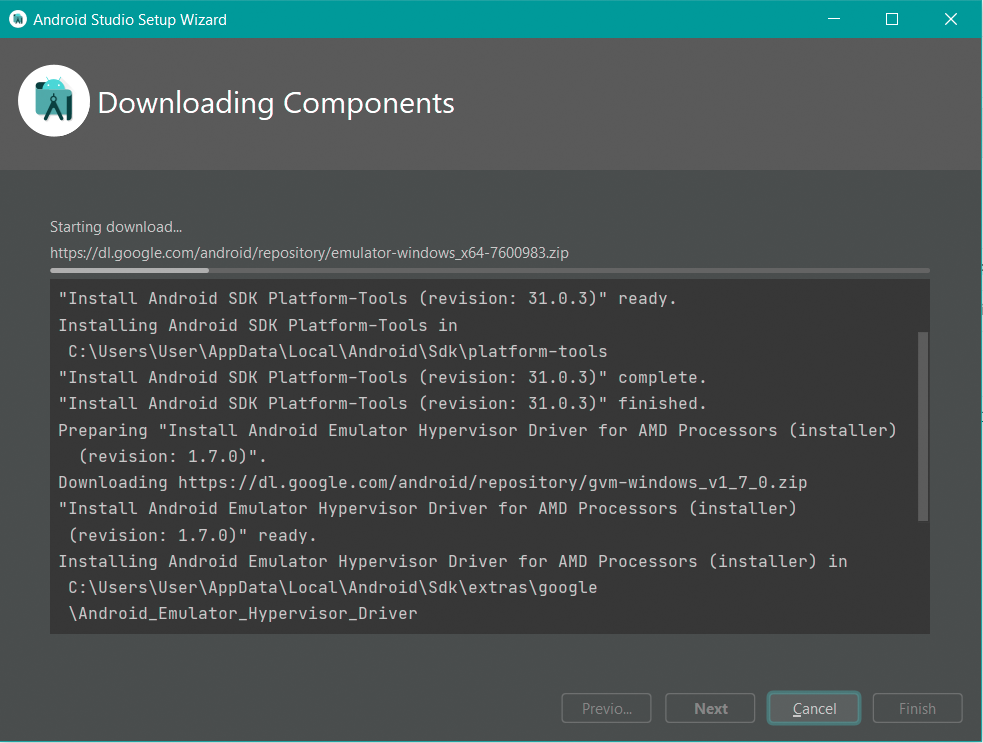
Click “Finish” once you’ve finished. All the Android tools required for the execution of your flutter projects will now be installed by Android Studio. Waiting is preferable because this could take some time.
We are now prepared to design and develop Flutter projects in Android Studio and execute them on a real or simulated Android device (emulator).
Setting Up an Android Emulator
To build your application, you can use either an Android device or an Android emulator. It depends totally on you.
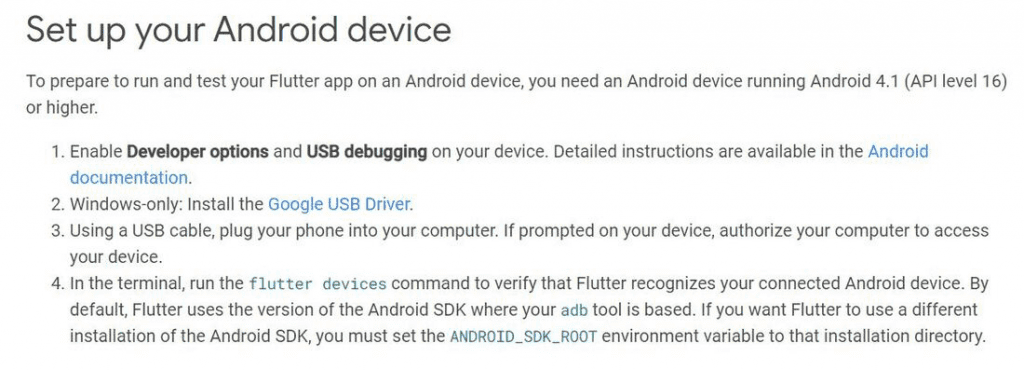
Visit the official documentation page and follow the detailed instructions for setting up an Android device. By clicking the link, you can download The Google USB Driver and install it. This can also be installed using Android Studio, which you can then use to develop the application by connecting to a real Android device.
Now, setting up the Android device is the only thing left to do. Now that the flutter framework is up and running, you can create gorgeous apps using devices or emulators. Go crazy!
People, who read this article also read: Flutter LayoutBuilder Widget Example Step by Step
Flutter SDK Installation on macOS
You must have the following components on your system in order to install Flutter on macOS.
| Operating System | macOS (64-bit) |
| Disk Space | 2.8 GB (does not include disk space for IDE/tools). |
| Tools | git 2.x |
| IDE | Xcode (Official) |
To install the Flutter SDK on macOS, follow the steps below:
- Visit the official website to download the most recent Flutter SDK installation bundle.
- To the desired location, extract the installation bundle. To extract using the terminal, enter the commands listed below.
cd ~/development
unzip ~/Downloads/flutter_macos_1.22.6-stable.zip- Your path should also include the flutter.
export PATH="$PATH:`pwd`/flutter/bin"- With the help of the flutter doctor command, you can determine whether flutter is set up properly by updating the PATH for the current session.
The steps below should be followed for permanent PATH configuration:
- Change the $HOME/.bashrc or $HOME/.bash_profile file.
- Replace [PATH_TO_FLUTTER_GIT_DIRECTORY] with the location of the folder into which you extracted the Flutter SDK when inserting the line below.
export PATH="$PATH:[PATH_TO_FLUTTER_GIT_DIRECTORY]/flutter/bin"- To automatically refresh the source file, open a new terminal window or run source $HOME/. to refresh the current terminal window. The Flutter SDK is now fully configured, and you can use flutter doctor to view additional configuration reports.
Flutter SDK installation on Linux
The following minimal requirements must be present on your operating system in order to install Flutter on Linux:
| Operating Systems: | Linux (64-bit) |
| Disk Space: | 600 MB (It does not include disk space for IDE/tools). |
| Tools: | bash curl file git 2.x mkdir rm unzip which xz-utils zip |
| Shared libraries: | libGLU.so.1 |
On a Linux operating system, snapd is the fastest way to install the Flutter SDK. Follow the official instructions to install snapd on Linux if you haven’t already.
Run the following command in the terminal once Snapd has been installed.
sudo snap install flutter --classicRun the following command to determine whether Flutter has been installed after using snapd:
flutter sdk-pathIn this way, you can do Flutter SDK installation on Windows, macOS, and Linux. Both the Flutter SDK and the Android SDK are necessary to create an app with Flutter. When you install Android Studio, the Android SDK is also installed.
Check the following Video for Further detailed instructions:


