This tutorial sheds light on how to make a color picker in flutter in just 3 steps!
Using the flutter_colorpicker library, we can easily implement a color-picking system if the app needs one. Because it is simple to customize, it saves time and improves user experience. Using the flutter_colorpicker library, we will build color pickers in this article. For better comprehension, follow along.
Table of Contents
People, who read this article also read: Flutter SDK Installation on Windows, macOS, Linux
To set up the package
First, we must include flutter_colorpicker in the pubspec.yaml file before we can use this library. Select one of the two techniques listed below to add it to the file.
In the terminal of a functioning IDE, type the following command:
flutter pub add flutter_colorpickerOr simply include it in the dependencies section. Next, go to the pub.


Importing a package
Following that, we must import the library in the manner described below:
import 'package:flutter_colorpicker/flutter_colorpicker.dart';
Implementation of color picker in Flutter
We create the variables currentColor and ListColor> currentColors in the Color class. In addition, we’re developing two features:
- Changes a color by taking color as a parameter.
- Changes the colors in a list using the parameter changeColors(ListColor>).
When the changeColor() or changeColors() functions are used, the currentColor variable’s value and the currentColors list, respectively, are modified.
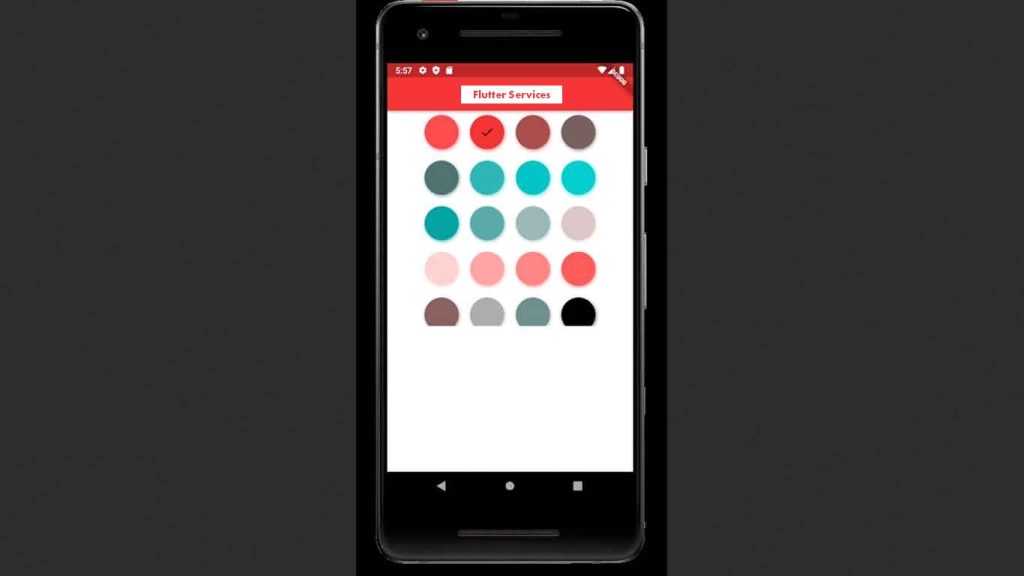
BlockPicker
PickerColor (Color) and onColorChanged (Function) are the two features needed by the BlockPicker() widget. However, in this case, we are only using these two properties to create a basic color picker. When a color is chosen to use the BlockPicker() widget, the pickerColor value is assigned to the appBar background color because the appBar background color has been set to be the currentColor.
class _MyAppState extends State<MyApp> {
Color currentColor = Colors.amber;
List<Color> currentColors = [Colors.yellow, Colors.green];

void changeColor(Color color) => setState(() => currentColor = color);

@override
Widget build(BuildContext context) {
	return MaterialApp(
		debugShowCheckedModeBanner: false,
		home: Scaffold(
		appBar: AppBar(
			title: const Text('FlutterService'),
			backgroundColor: currentColor,
			centerTitle: true,
		),
		body: Container(
			height: MediaQuery.of(context).size.height,
			width: MediaQuery.of(context).size.width,
			child: Expanded(
			child: BlockPicker(
					pickerColor: currentColor, onColorChanged: changeColor),
				),
		),
		));
}
}
Output:

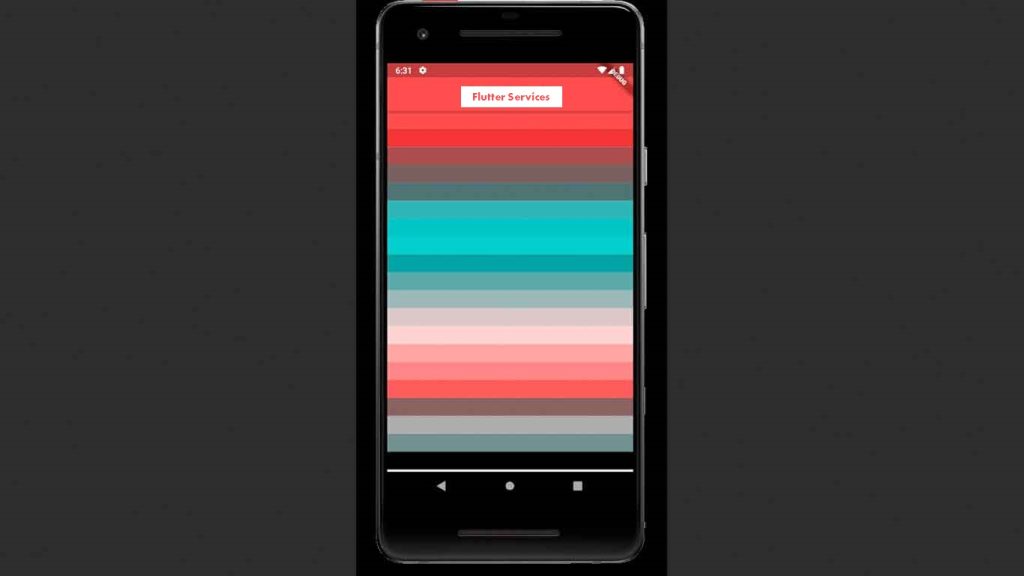
If we want to alter the structure of the color picker, we can also alter the layout. For instance, ListView.builder() is used in the code below to display colors in the list structure.
BlockPicker(
			pickerColor: currentColor,
			onColorChanged: changeColor,
			layoutBuilder: (context, colors, child) {
			return ListView.builder(
				itemCount: colors.length,
				itemBuilder: (context, idx) {
					return GestureDetector(
					onTap: () {
						changeColor(colors[idx]);
					},
					child: Container(
						height: 30, width: 10, color: colors[idx]),
					);
				});
			},
		),
Output:

Material Picker
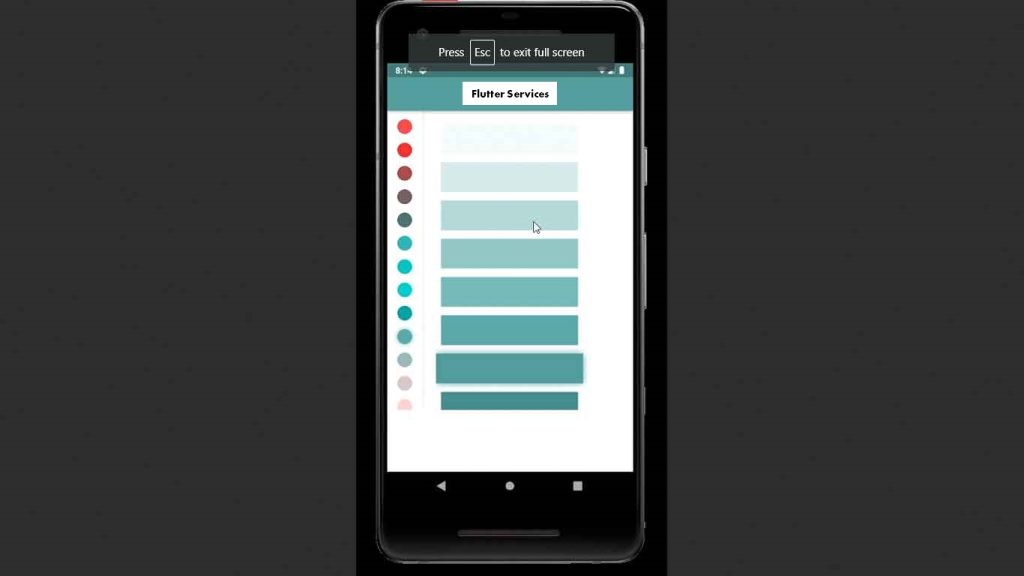
PickerColor (Color) and onColorChanged (Function) are additional properties needed by the MaterialPicker() widget. The function changeColor and changeColors remain the same.
class _MyAppState extends State<MyApp> {
Color currentColor = Colors.amber;
List<Color> currentColors = [Colors.yellow, Colors.green];

void changeColor(Color color) => setState(() => currentColor = color);

@override
Widget build(BuildContext context) {
	return MaterialApp(
		debugShowCheckedModeBanner: false,
		home: Scaffold(
		appBar: AppBar(
			title: const Text('FlutterService'),
			backgroundColor: currentColor,
			centerTitle: true,
		),
		body: Container(
			height: 600,
			child: Expanded(
			child: MaterialPicker(
					pickerColor: currentColor, onColorChanged: changeColor)
			),
		),
		));
}
}
Output:

MultipleChoiceBlockPicker
Using the MultipleChoiceBlockPicker() widget, we could select multiple colors simultaneously.
MultipleChoiceBlockPicker(
				pickerColors: currentColors,
				onColorsChanged: changeColors
			),
Detailed Source Code
import 'package:flutter/material.dart';
import 'package:flutter_colorpicker/flutter_colorpicker.dart';

void main() => runApp(const MaterialApp(home: MyApp()));

class MyApp extends StatefulWidget {
const MyApp({Key? key}) : super(key: key);

@override
State<StatefulWidget> createState() => _MyAppState();
}

class _MyAppState extends State<MyApp> {
Color currentColor = Colors.green;
List<Color> currentColors = [Colors.yellow, Colors.red];

void changeColor(Color color) => setState(() => currentColor = color);
void changeColors(List<Color> colors) =>
	setState(() => currentColors = colors);

@override
Widget build(BuildContext context) {
	return MaterialApp(
		debugShowCheckedModeBanner: false,
		home: Scaffold(
		appBar: AppBar(
			title: const Text('FlutterService'),
			backgroundColor: currentColor,
			centerTitle: true,
		),
		body: SingleChildScrollView(
			child: Container(
			height: 1000,
			child: Column(
				children: [
				Text("Block Picker"),
				Expanded(
					child: BlockPicker(
						pickerColor: currentColor, onColorChanged: changeColor),
				),
				SizedBox(height: 10),
				Text("Material Picker"),
				Expanded(
					child: MaterialPicker(
						pickerColor: currentColor, onColorChanged: changeColor),
				),
				SizedBox(height: 10),
				Text("MaterialChoiceBlockPicker"),
				Expanded(
					child: MultipleChoiceBlockPicker(
					pickerColors: currentColors,
					onColorsChanged: changeColors,
					),
				),
				],
			),
			),
		),
		));
}
}
Conclusion
People, who read this article also read: Flutter Liquid Swipe Animation
Because of its efficiency and simplicity, the color picker in Flutter is one of the most used components, especially in mobile applications. In this tutorial, we created a straightforward color picker in Flutter using the built-in widget of the color picker in Flutter. I sincerely hope you liked this tutorial!


