Android TextView Alignment Justify is a nice feature to align the text. Alignment defines the appearance and alignment of the margins of a paragraph: left-aligned text (justified), centered text (centered), or justified text, which aligns evenly along the left and right margins.
For example, in a paragraph that’s left-aligned (the most common alignment), the left edge of the paragraph is flush with the left margin.
In addition to the alignment property, you can also specify whether a paragraph should be indented from the left or right margin.
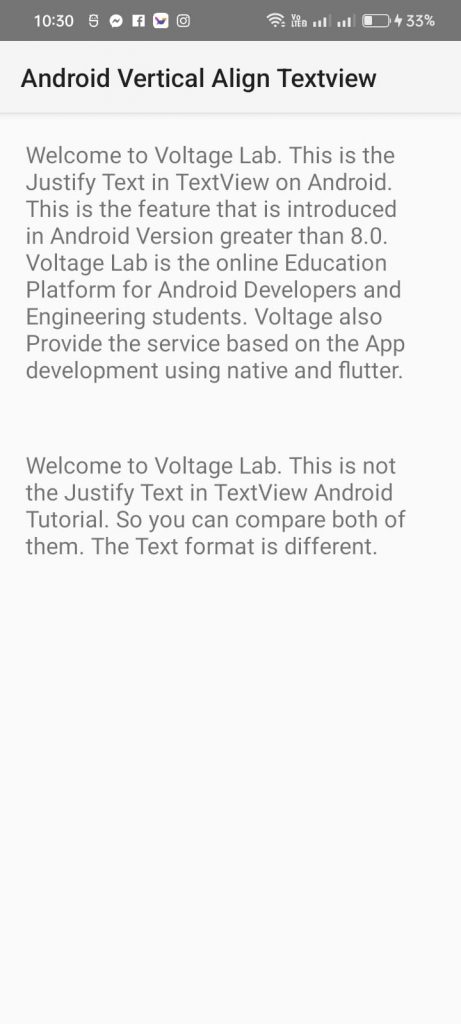
In this article, we will show you how to Justify Text in TextView on Android / Android TextView Alignment Justify? and the difference between justifying and non-justify.
For Android TextView Alignment Justify: You can simply use this for Justify.
Full Code of Android TextView Alignment Justify
Step 1 – Create a new project, and then follow these steps to build your first app. go to File -> New Project and fill in all required details to create a new project. We put the name of this project is Android TextView Alignment Justify.
Step 2 – Add the following codes to this activity_main.xml file.
<?xml version="1.0" encoding="utf-8"?>
<LinearLayout xmlns:android="http://schemas.android.com/apk/res/android"
    android:layout_width="match_parent"
    android:layout_height="match_parent"
    android:padding="20dp"
    android:orientation="vertical"
   tools:context=".MainActivity">

    <TextView
        android:layout_width="wrap_content"
        android:layout_height="wrap_content"
        android:gravity="center_vertical"
        android:textSize="18sp"
        android:justificationMode="inter_word"
        android:text="Welcome to Voltage Lab. This is the Justify Text in TextView on Android. This is the feature that is introduced in Android Version greater than 8.0. Voltage Lab is the online Education Platform for Android Developers and Engineering students. Voltage also Provide the service based on the App development using native and flutter.
" />

    <TextView
        android:layout_width="wrap_content"
        android:layout_height="wrap_content"
        android:textSize="18sp"
        android:layout_marginTop="50dp"
        android:text="Welcome to Voltage Lab. This is not the Justify Text in TextView Android Tutorial. So you can compare both of them. The Text format is different. " />
</LinearLayout>
Step 3 − Add the following code to src/MainActivity.java
package com.example.androidtextViewalignmentjustify;
import androidx.appcompat.app.AppCompatActivity;

import android.os.Bundle;

public class MainActivity extends AppCompatActivity {

    @Override
    protected void onCreate(Bundle savedInstanceState) {
        super.onCreate(savedInstanceState);
        setContentView(R.layout.activity_main);
    }
}
Step 4 − Add the following code to Manifests/AndroidManifest.xml
<?xml version="1.0" encoding="utf-8"?>
<manifest xmlns:android="http://schemas.android.com/apk/res/android"
    xmlns:tools="http://schemas.android.com/tools"
    package="com.example.androidtextViewalignmentjustify">

    <application
        android:allowBackup="true"
        android:dataExtractionRules="@xml/data_extraction_rules"
        android:fullBackupContent="@xml/backup_rules"
        android:icon="@mipmap/ic_launcher"
        android:label="@string/app_name"
        android:roundIcon="@mipmap/ic_launcher_round"
        android:supportsRtl="true"
        android:theme="@style/Theme.AndroidVerticalAlignTextview"
        tools:targetApi="31">
        <activity
            android:name=".MainActivity"
            android:theme="@style/Theme.AppCompat.Light"
            android:exported="true">
            <intent-filter>
                <action android:name="android.intent.action.MAIN" />

                <category android:name="android.intent.category.LAUNCHER" />
            </intent-filter>
        </activity>
    </application>

</manifest>
Let’s try to run the application. I’m assuming you’ve connected your actual Android device with your computer.
To start the app from the android studio, open an activity file, click the run icon at the top of the toolbar, and
Select your mobile device as an option, and then check your mobile device which will display your default screen.


This is all about the Android TextView Alignment Justify.
Read More:
Align Text to the Right Android & Vertical TextView Without Programmatically


